
For the Rodina! Bolt Action 3.0 Soviet Starter Army Review
Stash those potatoes, down the vodka, borrow a couple of rounds off of Yuri and prepare to fight against the outright extermination of your fellow countrymen! Warlord Games were incredibly kind and send me out a sample of their ‘Forward To Berlin!’ starter box. I’m an established Bolt Action fan of 5 years, so I’m very excited to see what is new in 3.0 and how this carries over to some new plastic kits. Without further delay, lets begin!

The Kits, the builds and the list!
List wise for Bolt Action 3.0, list building is a little different. You rely on building your army in to seperate platoons (rifle platoons, armoured platoons, heavy weapon platoons etc), and each one needs its own respective officer. Because of this, 2 out of the 42 new plastic infantry were designated to lead the heavy weapon platoon and the rifle platoon. Alongside that I wanted a 2 man sniper team, a couple of staff for my rifle platoon commander, a commissar (And a sweet wuffer dog), and the rest would go in to my rifle platoon in the form of 2x 10 man LMG squads, a 10 man NKVD squad and a 5 man Tank Rider squad. The versatility in this box around the infantry is fantastic. You get an assortment of parts to really customise your squads whether theyre rifle chugging conscripts, or Siberian veterans carrying a load of pilfered German guns. The new infantry to build are excellent. The old days of gluing two seperate arms and a gun in place while cursing so much, Stalin himself would be mortified. The new bits are all sculpted with one feature/weapon in an arm, with the other arm fitting in to space with minimal faff.

I kept the cloaks to characters and snipers to make sure they’re easily distinguishable on the table. The Tank Riders all got rolled up capes/greatcoats to again keep them easily to spot.
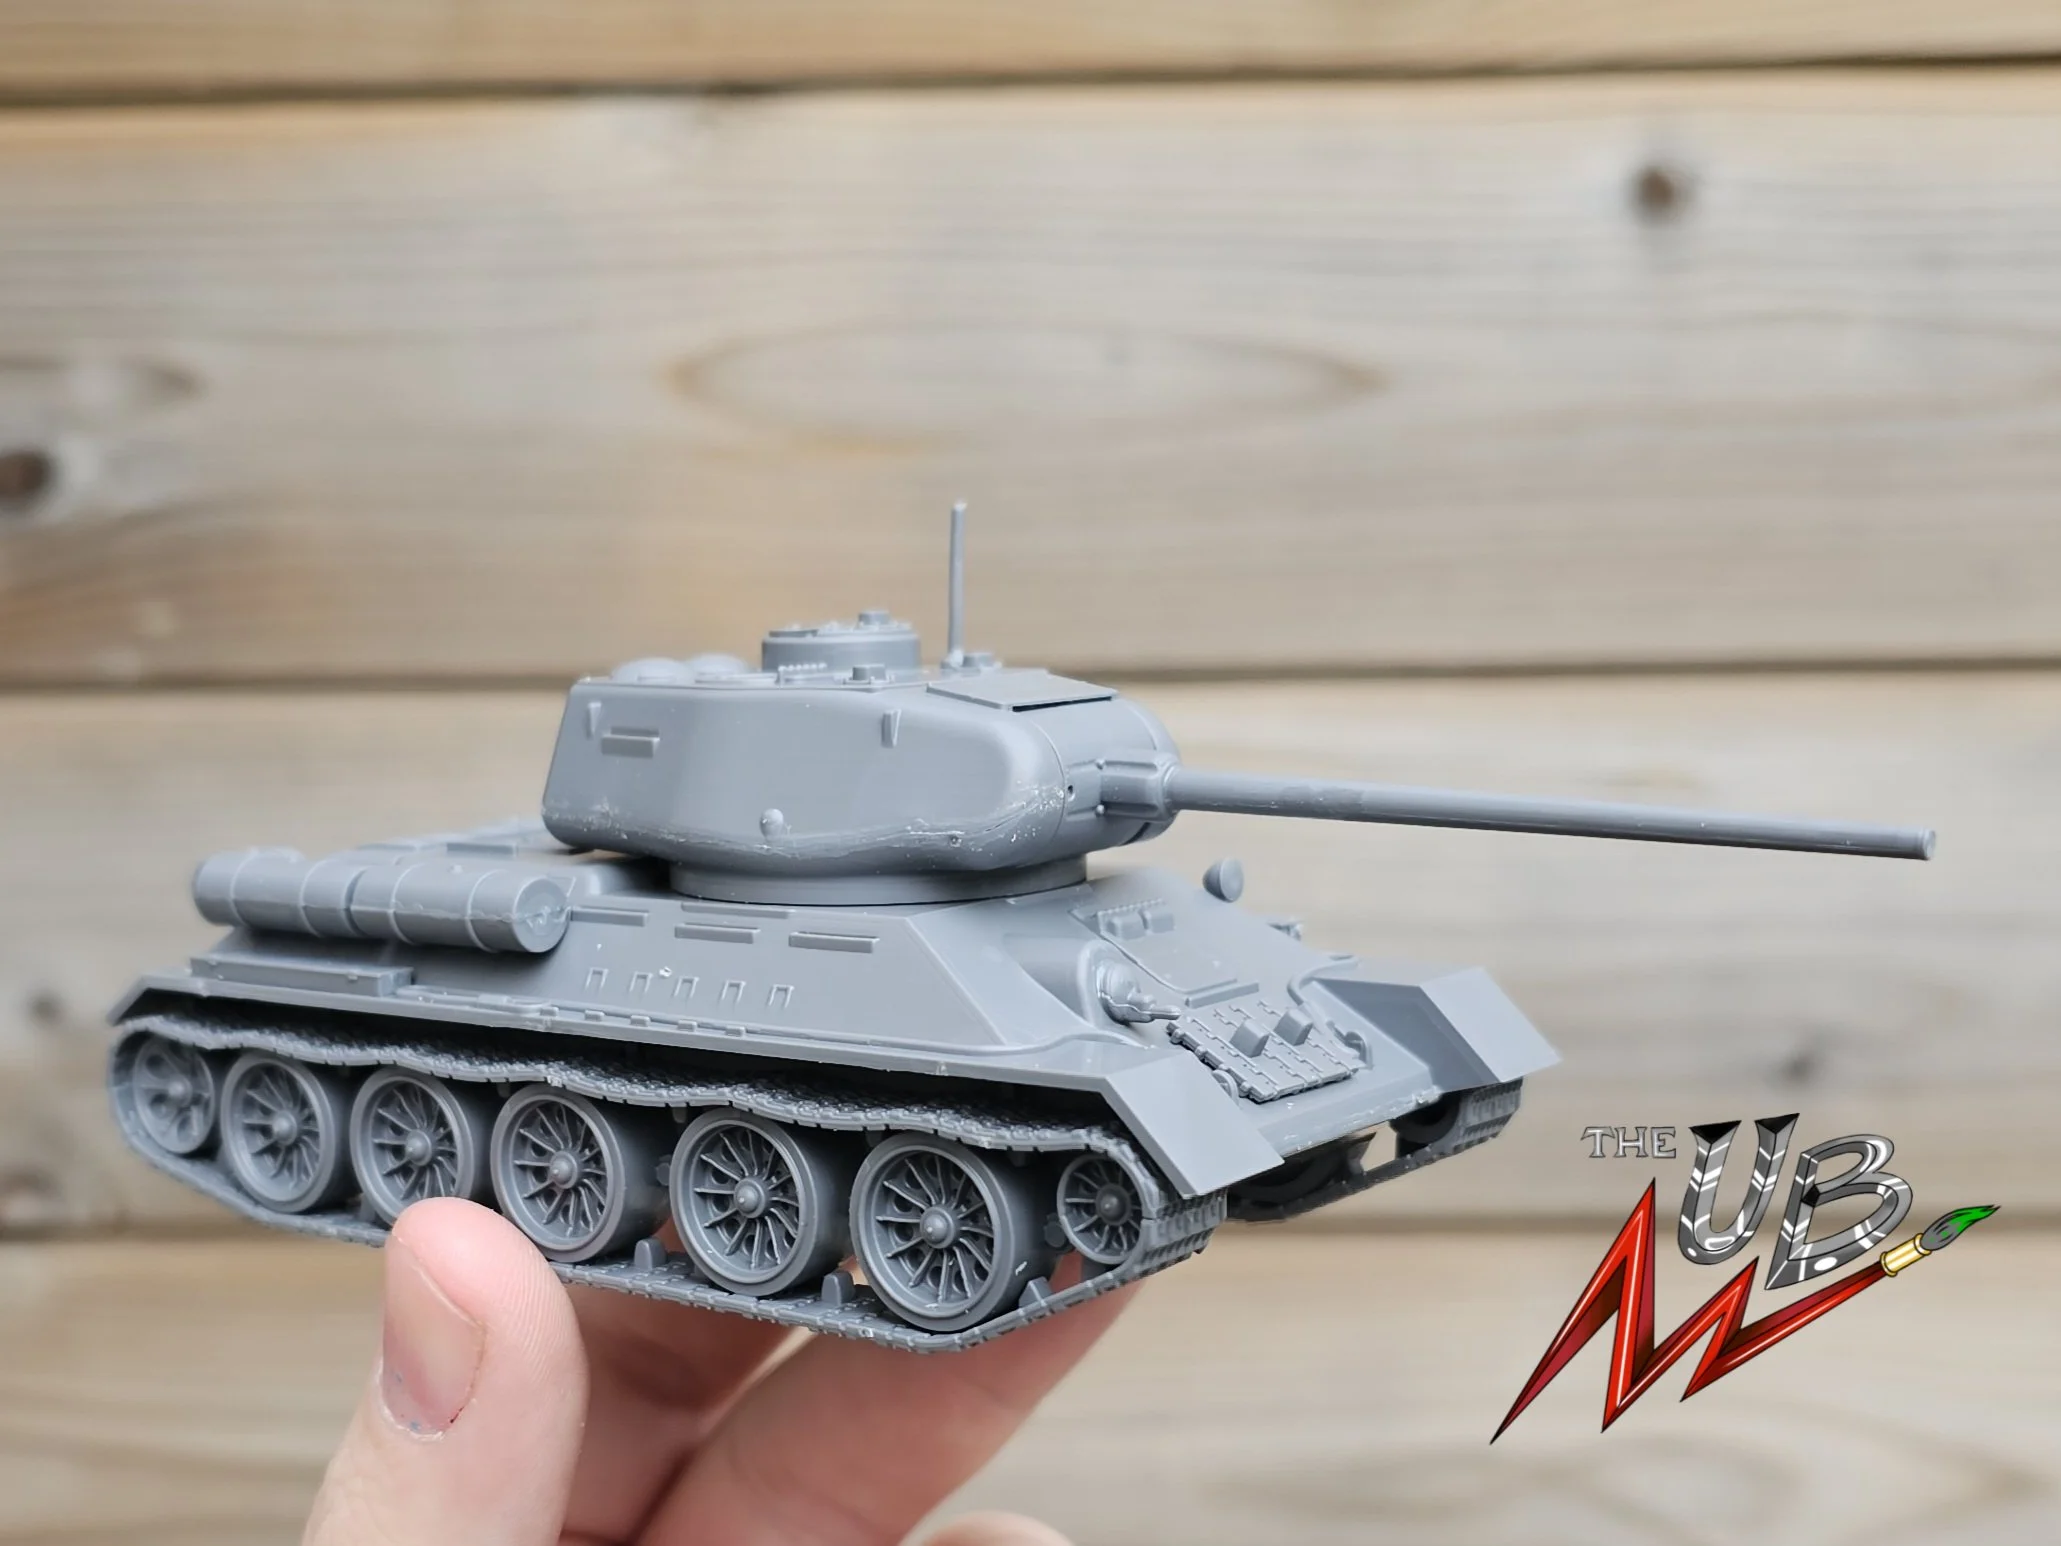
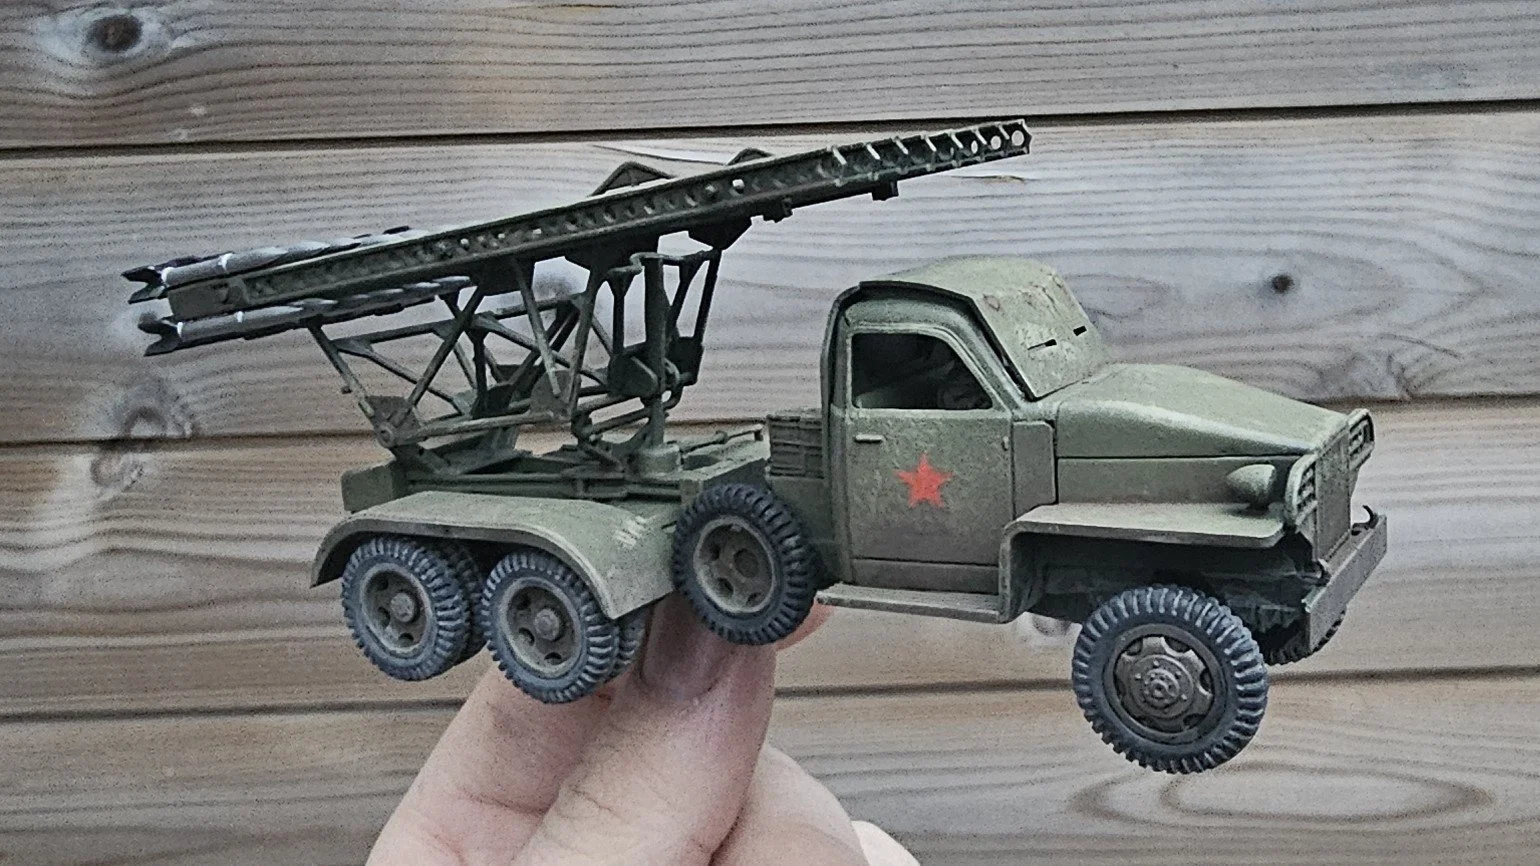
The T34 85 was a doddle to build. I’ve done a few of these Warlord Tanks and they’re relatively painless bar some small wirey parts like MMG’s. The Katyusha, new in plastic, was a bit more challenging. Many small components liek cranks and handles, and the missile rack took some doing. Plus, there’s little wiggle room to paint the driver as a sub assembly, so my chap was glued in, and painted in situ. He won’t be picked for any dates, but thankfully he’s too nusy fulfilling his duty to be chasing Svetlana.
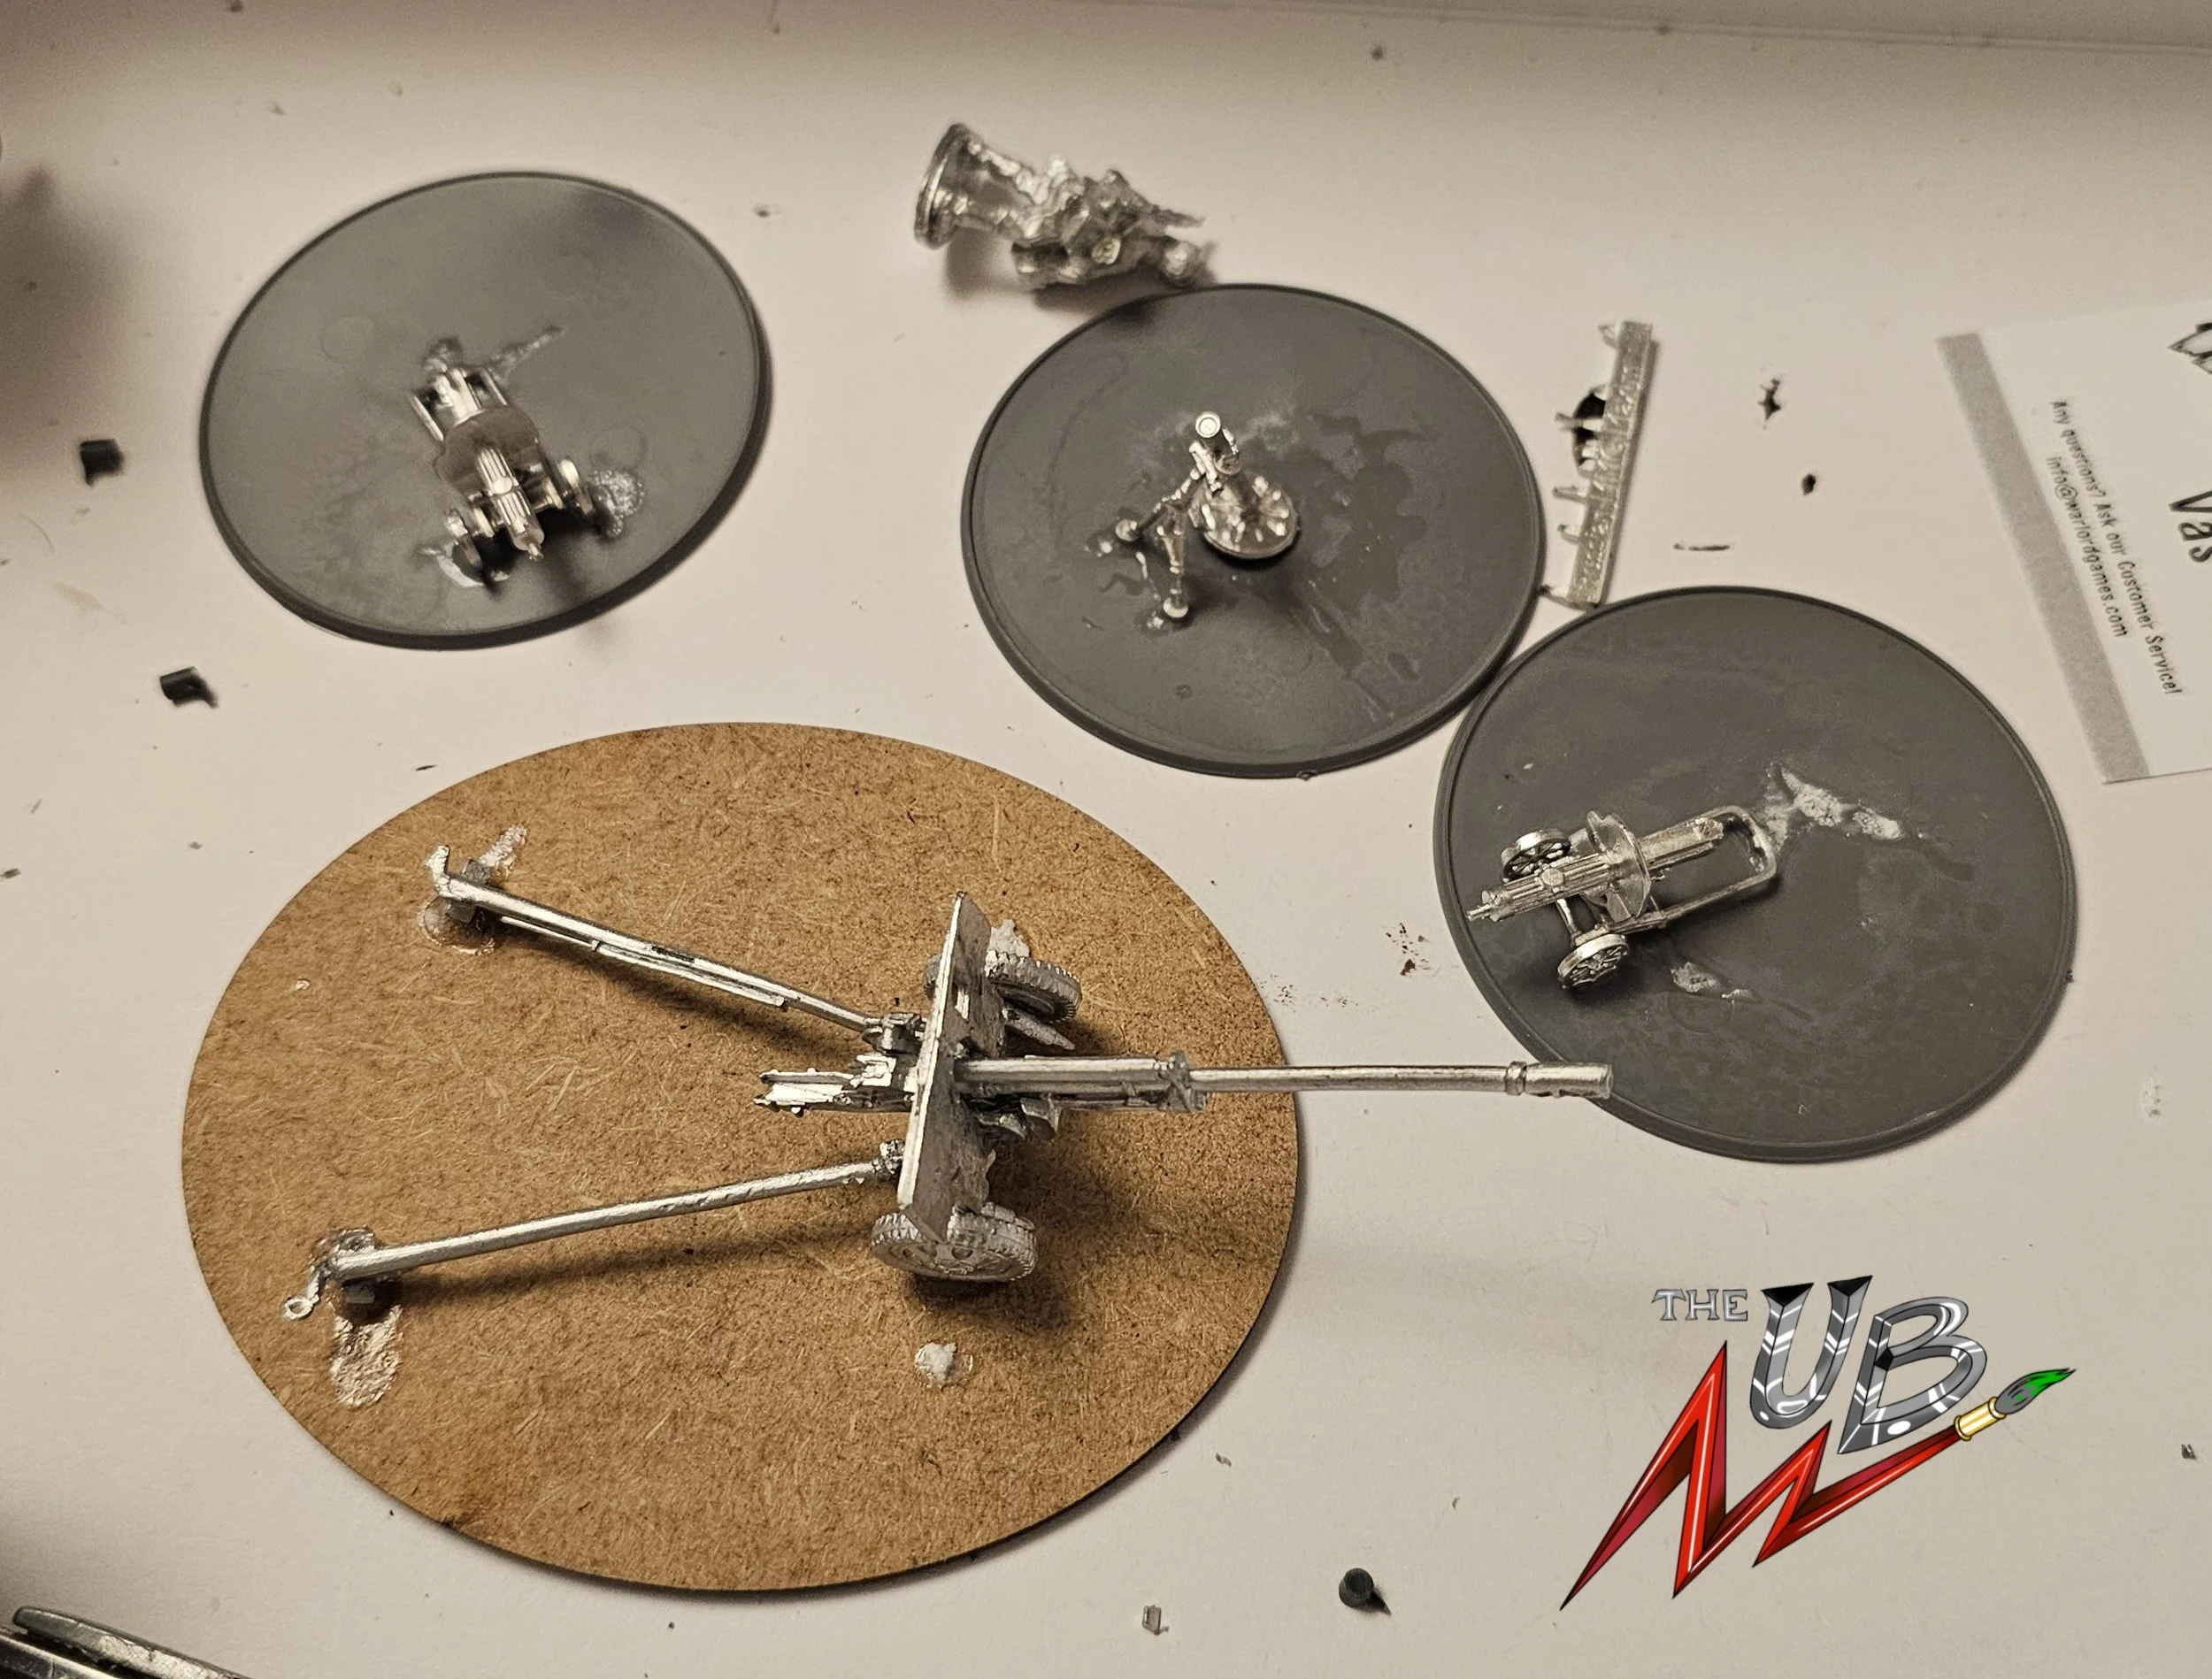
Now, if you’ve ever built some Heavy Weapon Teams, you’ll know they’re a pig. These are unchanged kits bar the use of Warlord Resin characters for the crews. For guns that have so few bits, they’re a chuffer to build. Good superglue, activator and patience. Get your guns glued and down on the bases and leave the crews off to paint seperately. This box EASILY gives you enough wiggle room to get a 1300 point army in with some variances for rank among your units. Superb value for an entire and playable army in one box.
Fly the colours, and the scarlet banners!
Painting Bolt Action has some predetermined misconceptions about it. There’s a lot of “to-do” about colours and getting them as historically accurate as possible (“ACHSHUALLY I THINK YOU’LL FIND THAT SHADE OF GRASS ISN’T FOUND IN THIS VILLAGE OF HUNGARY IN 1944” etc).
Like all things in your hobby, it’s just that… Yours! So you go with however you want. As accurate or as wild as you like. I wanted something of a compromise between historical accuracy and painting F A S T. Speed paints came in clutch (as per) for this project after playing around to see what would work well and where.

Cheeky Insta Link!
The paint list for my Russians is:
Primed Colour Forge Matt Black, zenithaled Matt White
Brownish Decay Speed Paint on the uniforms
Mummified Grime for the capes and greatcoats
Coal Black on the Boots
Crusader Skin on the flesh
Russian Sand on a few straps, waterskin and canvas bags
Dark Wood on other belts and straps
Hardened Leather on the weapon stocks
Brown Wash on the straps and weapons.
Russian Green for the helmets (Recess shaded with Brown wash)
Gun Metal on the weapons and metallic details
Black Wash on the metallics.
Done! (For the NKVD chaps, Beowulf Blue on the trousers and caps. Bold Pyrrole Red for the details. True Brass for the cap pins.


The basing is just some Geek Gaming Scenics stuff I’ve had for a few years but I can’t remember what it was! But any nice generic grassy plain stuff is perfect.
Rolling Thunder, and Stalin’s Organ!
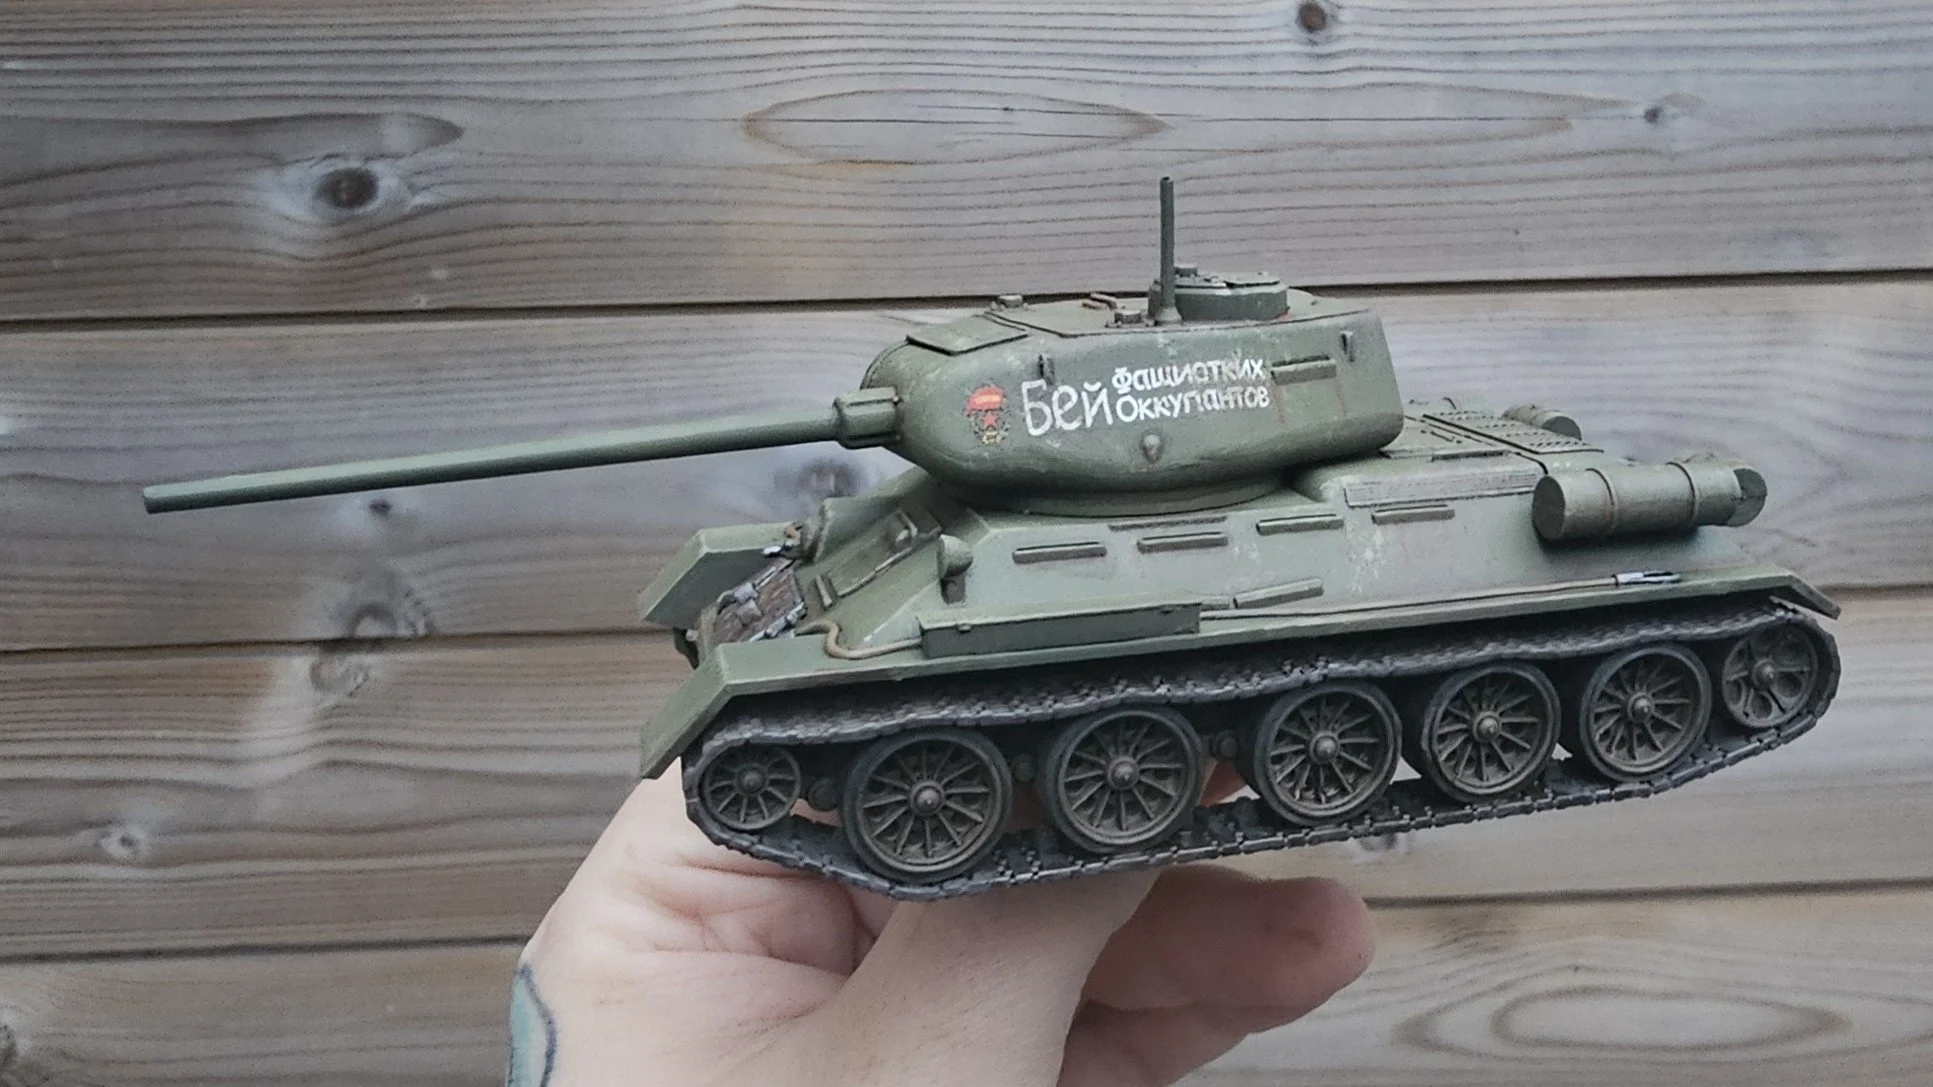
The vehicles and Heavy Weapons took minimal effort to make look fit for the part. They were primed Matt Black, airbrush Zenithaled Protective Green, and highlighted with airbrush using Russian Green. I then applied Transfers, painted extra details and gave a good oil wash of 50/50 Burnt Umbar and Burnt Sienna. After a good varnish, I did some scuff highlighting by adding some bone to Russian Green and sponging that on the sharper edges of the armour, and stippling lightly on the flatter panels. I then did a similar thing but even more subtle with some Dark Umbar acrylic.

FINISHED! ONWARDS, COMRADES!

And there we have it. Our brave heroes of the Great Patriotic War are ready to fend off the German enemy!
I hope you enjoyed this article. If you did, consider heading over to my socials (Below) and giving us a follow where you find me. I’d love to do a video tutorial in the near future, but we’ll see what I can do about that.
Thank you again to Warlord for sending over these bits to me to work on ahead of release. I’m VERY excited to see what comes to me next…
The following companies also deserve my eternal thanks, a handshake and a shot of russian standard, enjoy the discount code alongside my personal recommendation!
www.orangebrushes.com - UNRELENTING10 - 10% off at checkout for some absolutely excellent brushes.
Gaahleri Airbrushes - Superb. accessibly and exceptionally priced airbrushes. Great for beginner and intermediate airbrushers!
Interested in what else I’m working on right now? After some hobby advice? Wanna ask something about this article that I missed? Follow below, come in to the Discord and join our Hobby Clinic, and if you’re able and kind, sign up to my Discord to help support me to keep hobbyin’.
Peace!