
SATURNINE CHARITY PAINTING CHALLENGE - (PART ONE) PAINTING FOR SUCCESS!

It is the Tuesday after the weekend of the paintathon, and I feel one more good nights sleep will finally see me back to normal levels of energy! It was a long, laborious and on two occasions, rage inducing task getting 50 models painted over two days. But, it is done! Everything is painted to a standard I’m happy with and consider fit for the table/cabinet. And most important, we smashed out goal in fundraising for Acorns Children’s Hospice. Originally set at £250.00, we currently sit at £1026.00! Which is incredible. That money will go on to help support the families and kids requiring the services of Acorns, which can be life affirming and quality improving treatment and care. To every doner, sharer, supporter and well wisher, massive and sincere thank you! I chose this charity not just for the stoic work they do, but also in memory of the recently passed mad man, John Michael Osbourne. Acorns were one of the charities chosen and supported by the Back to the Beginning concert in July, which I enjoyed the stream of with pals. If it wasn’t for Ozzy, Bill, Geezer and Tony acting like twats as young lads in the 70’s, without their impact on the rock and metal culture, it’s impossible to say where I and millions of others would be. Music and metal culture is and has been a foundation of my life since before I was a teenager, and it’s got me through some very VERY shit times in life. So, this event of mine was a fundraiser to Acorns, a challenge of affirmation to myself as a professional painter, and a tribute of thanks to Ozzy. He’ll always be a pleasant and comforting reminder that sometimes in life, it’s not just fine to be a bit wild and bizarre, it’s essential.

Now! On to the painting. The previous two articles in this series go over building, prepping and priming this project. A feat all unto itself! But important. See the “5 P’s” in the previous article.
I’ll go over each step as I went, which was applied in the exact same order to each model in the army to ensure a cohesive and uniform result for the force as a whole. You’d hope that’d be the result, painting 50 models in one batch!
The steps are done for reasons I’ll explain as I go. It may seem sporadic, but the saying of ‘Trust the process’ applies here. And after painting up to a thousand space marines using these steps, trust me too.
BLUE’S, HOLSTERS AND NON METALLICS
The first step is to approach every non metallic texture and detail (Bar faces and plumes) with speed paints. These are as follows:
Holsters, straps and pouches - Dark Wood Army Painter Speed Paint - Any brown or tan paint will work for this. I really like this colour, plus I wanted a darker colour on the force to balance it out as the majority their colour will be an off white.
Under suit/Black Carapace/Ribbing - Black Legion Citadel Contrast Paint - An absolute hero for every painters arsenal. If you make a mess, tidy up with a white paint (Bold Titanium White Pro Acryl being the one you need). Don’t forget under their butt plate, the inside of the elbows and around the necks for any bare heads on your chaps. The gun casings and chain axes will be painted with this later, and I’ll explain why then, and now now.
Grenades - Militarum Green Citadel Contrast Paint - Any green here will do. I used this on the frag grenades, because I love a green grenade, and left the Krak Grenades to be painted silver later.
That’s it! Almost all of this is only relevant to the MKII marines and Characters of this project, but you can be as creative as you want. They’re your toy soldiers!

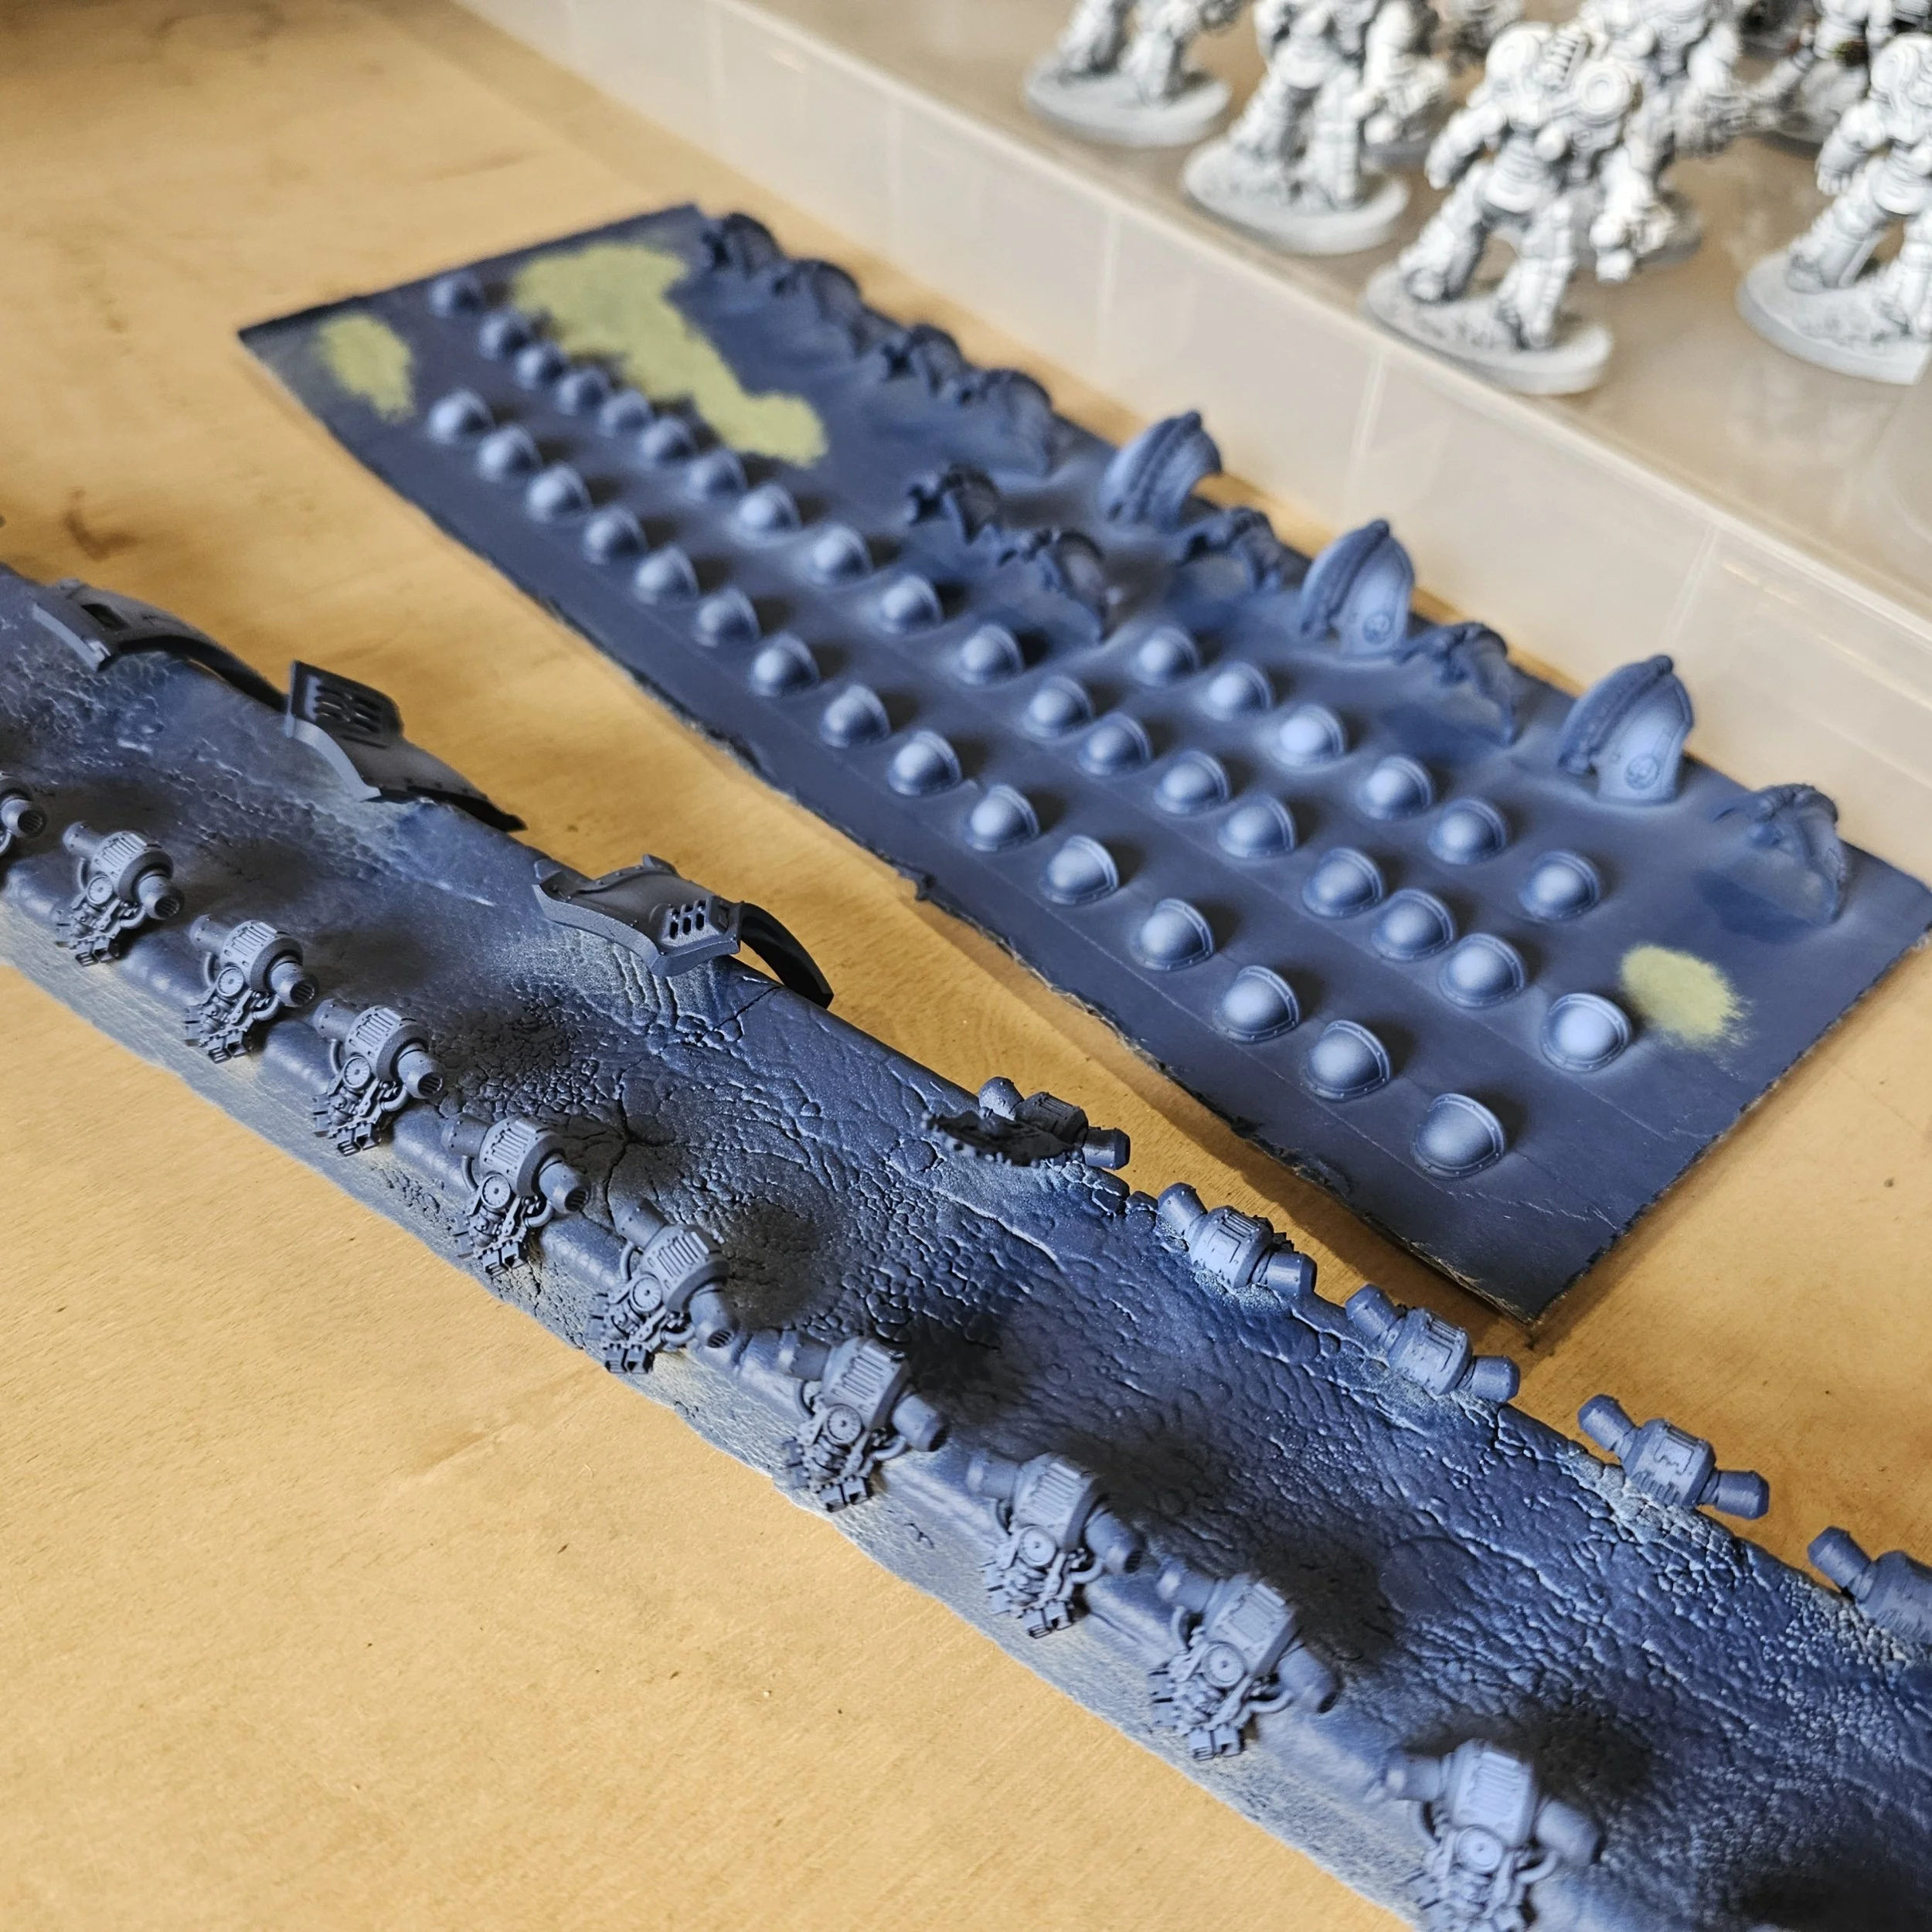
Up next, upping those blues. We used Tempest Blue spray from Colour Forge (Thanks again for the support, guys!) on all the shoulder pads and power packs. These all lined up ready for rapid and precise airbrush highlighting.
“ERGH! AIRBRUSHING! THIS GUIDE IS DUMB AND I HATE IT AND YOU, CHRIS!”
Pump your brakes there, sunshine. This is the only step where you ideally want to use an airbrush! You can swap this out with some gradual gradiant drybrushing, or dust with a brighter rattle can of your choice. You can even stipple it on with a sponge and it’ll still look great. I have an airbrush, and I needed the speed of it as much as I needed the effect. So if you’re not an airbrusher, please don’t stop reading. I’ll mention using it again later, but purely for varnishing, which you can easily swap out for Gloss and Matt rattle cans. Right, enough negativity, on with the paint!
For the blue, I chose Faded Ultramarine from Monument Hobbies Pro Acryl. A good alternative is Calgar Blue layer from Citadel. I used my airbrush to blast a highlight on the apex of the curve of each should pad, top down, to up the colour. This doesn’t just add visual appeal, it also give a paler background for our dark red transfer to sit on, which looks wonderful. I did the same on the power packs working from the top side front to back.
With that, I went over the additional details on the rarer bits of the force. Vexilla’s I painted with Pallid Bone Army Painter Speed Paint, Blood Angels Red Citadel Contrast Paint I painted onto a Power Fist (Because maybe he just likes the colour idk it’s his fist ffs), and on to the bindings on the axes throughout the army. That’s just about it!
The reason we’re not painting the faces and plumes yet is because by the time we’ve finished varnishing, oil washing, varnishing again, we’ll lose some of the prominent colour on these details. So, we leave those until the end after everything else is close to finished.
With that all sorted, we’re about 69% (nice) done with painted these models! The next step is transfers.

TRANSFERS… SATAN’S STICKERS!
Once you can master putting a transfer flat on a Marines shoulder pad, you can accomplish anything in life… Well… maybe not life… but in the hobby, absolutely.
The first step to getting this right is laying down a light gloss varnish over your model. You could focus this purely on where your transfers will sit, but we’re going to need an all over gloss soon anyway, so more now, less later. You can do this with a rattle can (Like Windsor and Newton) or with an airbrush. Whatever your preference. Just don’t over do it! Light dusty passes all over, especially from the underside where we want our later oil wash to do some heavy lifting.
When you’ve given it plenty of time to cure (Cure meaning, to be fully set and solid, not just dry to touch on the surface), about 30/60 minutes should do, less with the suns help, we can start getting our transfer on.
Grab your transfers (I kept mind in strips per squad, much easier to handle than 100, individually cut tiny transfers) and quickly dunk them in CLEAN cold water. I then pop them on a paper towel (if I’m a guest somewhere) or straight on my desk. After a minute or so, the transfer will be able to be wiggled about off the paper.
I laid out all my pads and transfers so it can be easy for my to identify which groups gets which transfer, and because they’re all on their own sheets, that a lot less picking up and putting down 40+ marines as we apply them!
Grab yourself some Micro Set and Micro Sol (aka Miracle juice) and grab the Set first (blue one). Apply a light amount of this to the surface your transfer is sitting on, then using a long thin brush, gently roll it under the transfer and carefully, from one end to the other, lift it off the backing paper. Work it roughly where you want it on the surface, apply more Micro Sel if it starts to dry up, until you’re happy with it’s placement. Soak up any solution carefully with your brush. If you want to flatten and even out your transfer, gently brush it from the center of the transfer out, rolling your brush instead of dragging it which could move the transfer out of place, and invoke much swearing. If you your transfer starts to fold on itself, don’t stress! They’re much more hardwearing than they used to be. Pop it back on the backing paper and use your thin brush to work it to unfold. Once your transfer is in place, and I stress this massively at each of my painting workshops as a critical step…
LEAVE IT THE F#£K ALONE!
There’s nothing more infuriating than being too eager or rushing that causes it to slip out of place, or tear because it’s part dry. Give it plenty of time to dry (30 minutes at LEAST) and ensure it’s not drowning in Micro Set so it dries in better time. The good news that because I was applying so many transfers across so many models, by the time I got one down on the last model, the first ones were dry and ready to go with the Micro Sol (red). Apply this in thin amounts, from the centre of the transfer out and carefully, until the whole transfer and it’s edges are coated. Applying this over the entire surface/panel is a safe shout too. This stuff dries MUCH quick than the blue Set stuff (and doesn’t smell as horrid). By the time this stuff dries, you should have a flat, neat, sexy af transfer down. If you don’t, apply another layer of the sol as before until flat. Use your brush and gently roll it center outward with Micro Sol applied to flatten and even out any creases.
Congratulations! Transfers are a doddle, and make models look absolutely wicked…
Now do this 100+ times. I’ll get the kettle on. Once done, you can now glue on all your subassemblies. Which freeze up lots of table space, and makes your project look LEAPS ahead in progress.
Once you’ve got all your transfers down (AND THEY ARE COMPLETLY DRY FFS PLZ LISTEN TO ME) and subassemblies attached, it’s time for another gloss coat. If you did a thorough one last time, a light dusting ensuring to hit the transfers will suffice. If you did a light one last time, ensure this covers the whole and every angle of the model. Give plenty of time to cure, and now it’s time to get FILTHY!
“SHADE AN ENTIRE ARMY IN MINUTES? OIL BE DAMNED!”
Oil washes are great. I love them. They can be as intense or soft as you want, they can be applied neatly and delicately or slathered all over like a dib dab lollipop. They’re incredibly user friendly and can be tidied up and taken away with minimal effort. And thanks to odourlous thinners, you can if you’d like avoid any smelly white spirits if that’s not your jam. I use Windsor and Newton’s artist oil paints and bought two small tubes easily a decade ago, and they still have about half their contents inside, and I use a LOT of this stuff. The equivalent in time and money spent using and buying Citadel shades wouldn’t even be worth considering.
Bored of reading my waffle? Here’s part one of a two part short video I made on mixing and applying Oil Washes. Don’t forget to subscribe while there!
So, the reason we gloss our models before hand isn’t just to protect our paint work and transfers underneath (That said, provided your paints are fully dry on your model, it take some doing getting acrylic paint off models with white spirits. Its rough sponges that cause that kind of upset). We gloss to support the capillary action of our thinned oils to flow all over the details we need it to and to build a strong deposit in recesses, while leaving thin, easily removable amounts from bits where we don’t want it. The more you know! You will need some scatty nasty old brushes for this job, mind. Oil washes is where brushes go to die.

Using an spray can lid (Save these, as they’re fantastic for this job and can be chucked when done), I applied two equal sized ‘dollaps’ in to the lid of Burnt Umber and Burnt Sienna. This gives us a nice earth rust colour. Perfect for staining white armour for psychotic power armoured lunatics who are more intent on cracking heads than caring for what keeps them safe on the battlefield. I then used a plastic pipette (I bought a bag of 50 off Amazon for pennies) to add 5 ‘loads’ of white spirits to the oils, and mixed thoroughly with an old wrecked brush. You can intensify or reduce the strength of your wash by adding more spirits to weaken, and less spirits to strengthen. You’ll find what works for you and your personal taste of ‘grimdark’.
I leave this for at least an hour. If it’s a dry and breezy day outside, leave your soaked boyos out there for the spirits to dissipate even fast. It should ‘look’ dry, but even there’s a few bits still damp, you can work away on them. I wouldn’t leave it for any longer than 3ish hours unless you want to have some muck and filth you can’t undo.
Now, the other joy of oils, taking away the majority of the staining, leaving grime in the nooks and crannies where you want it! Grab some old case fame, and using clean white spirits, dip your sponge in and squeeze the majority of the liquid. The sponge should be lightly damp, not sodden. if you squeeze it, nothing should drip out of it. It might be worth wearing gloves for this step, unless like me you love the feeling of a recent cut or nik catching some spirits and waking you up good and proper.
Now with your barely moist sponge, carefully press and drag it against your oil loved minis. Try and keep it directional and downward. This will take away excess oil paint and staining, while leaving a few subtle downard streaks that emulate filth being dragged down by moisture and gravity. If you do this too much, or with too much spirits in your sponge, you undo all your wash. This is fine, because you can just do it again! Keep going until you’re happy with the result of a nice earth recess shade where you want it, and nice brighter areas of your models where you’ve taken the oils away. This will take practice if you’re new to it. Keep going and you’ll eventually find the result you like. Just DO NOT APPLY TOO MUCH PRESSURE WITH THE SPONGE or you’ll undo work and time invested by taking paint away. It’s worth having a few sponges at hand as they can get very filthy quickly. And you wouldn’t wash your pots with a dirty sponge and expect them to shine, would you?
once you’ve done this across your whole project. Give them plenty of time to dry, ideally overnight. This give good time for the spirits to dissipate and for the oils to dry where they need to.


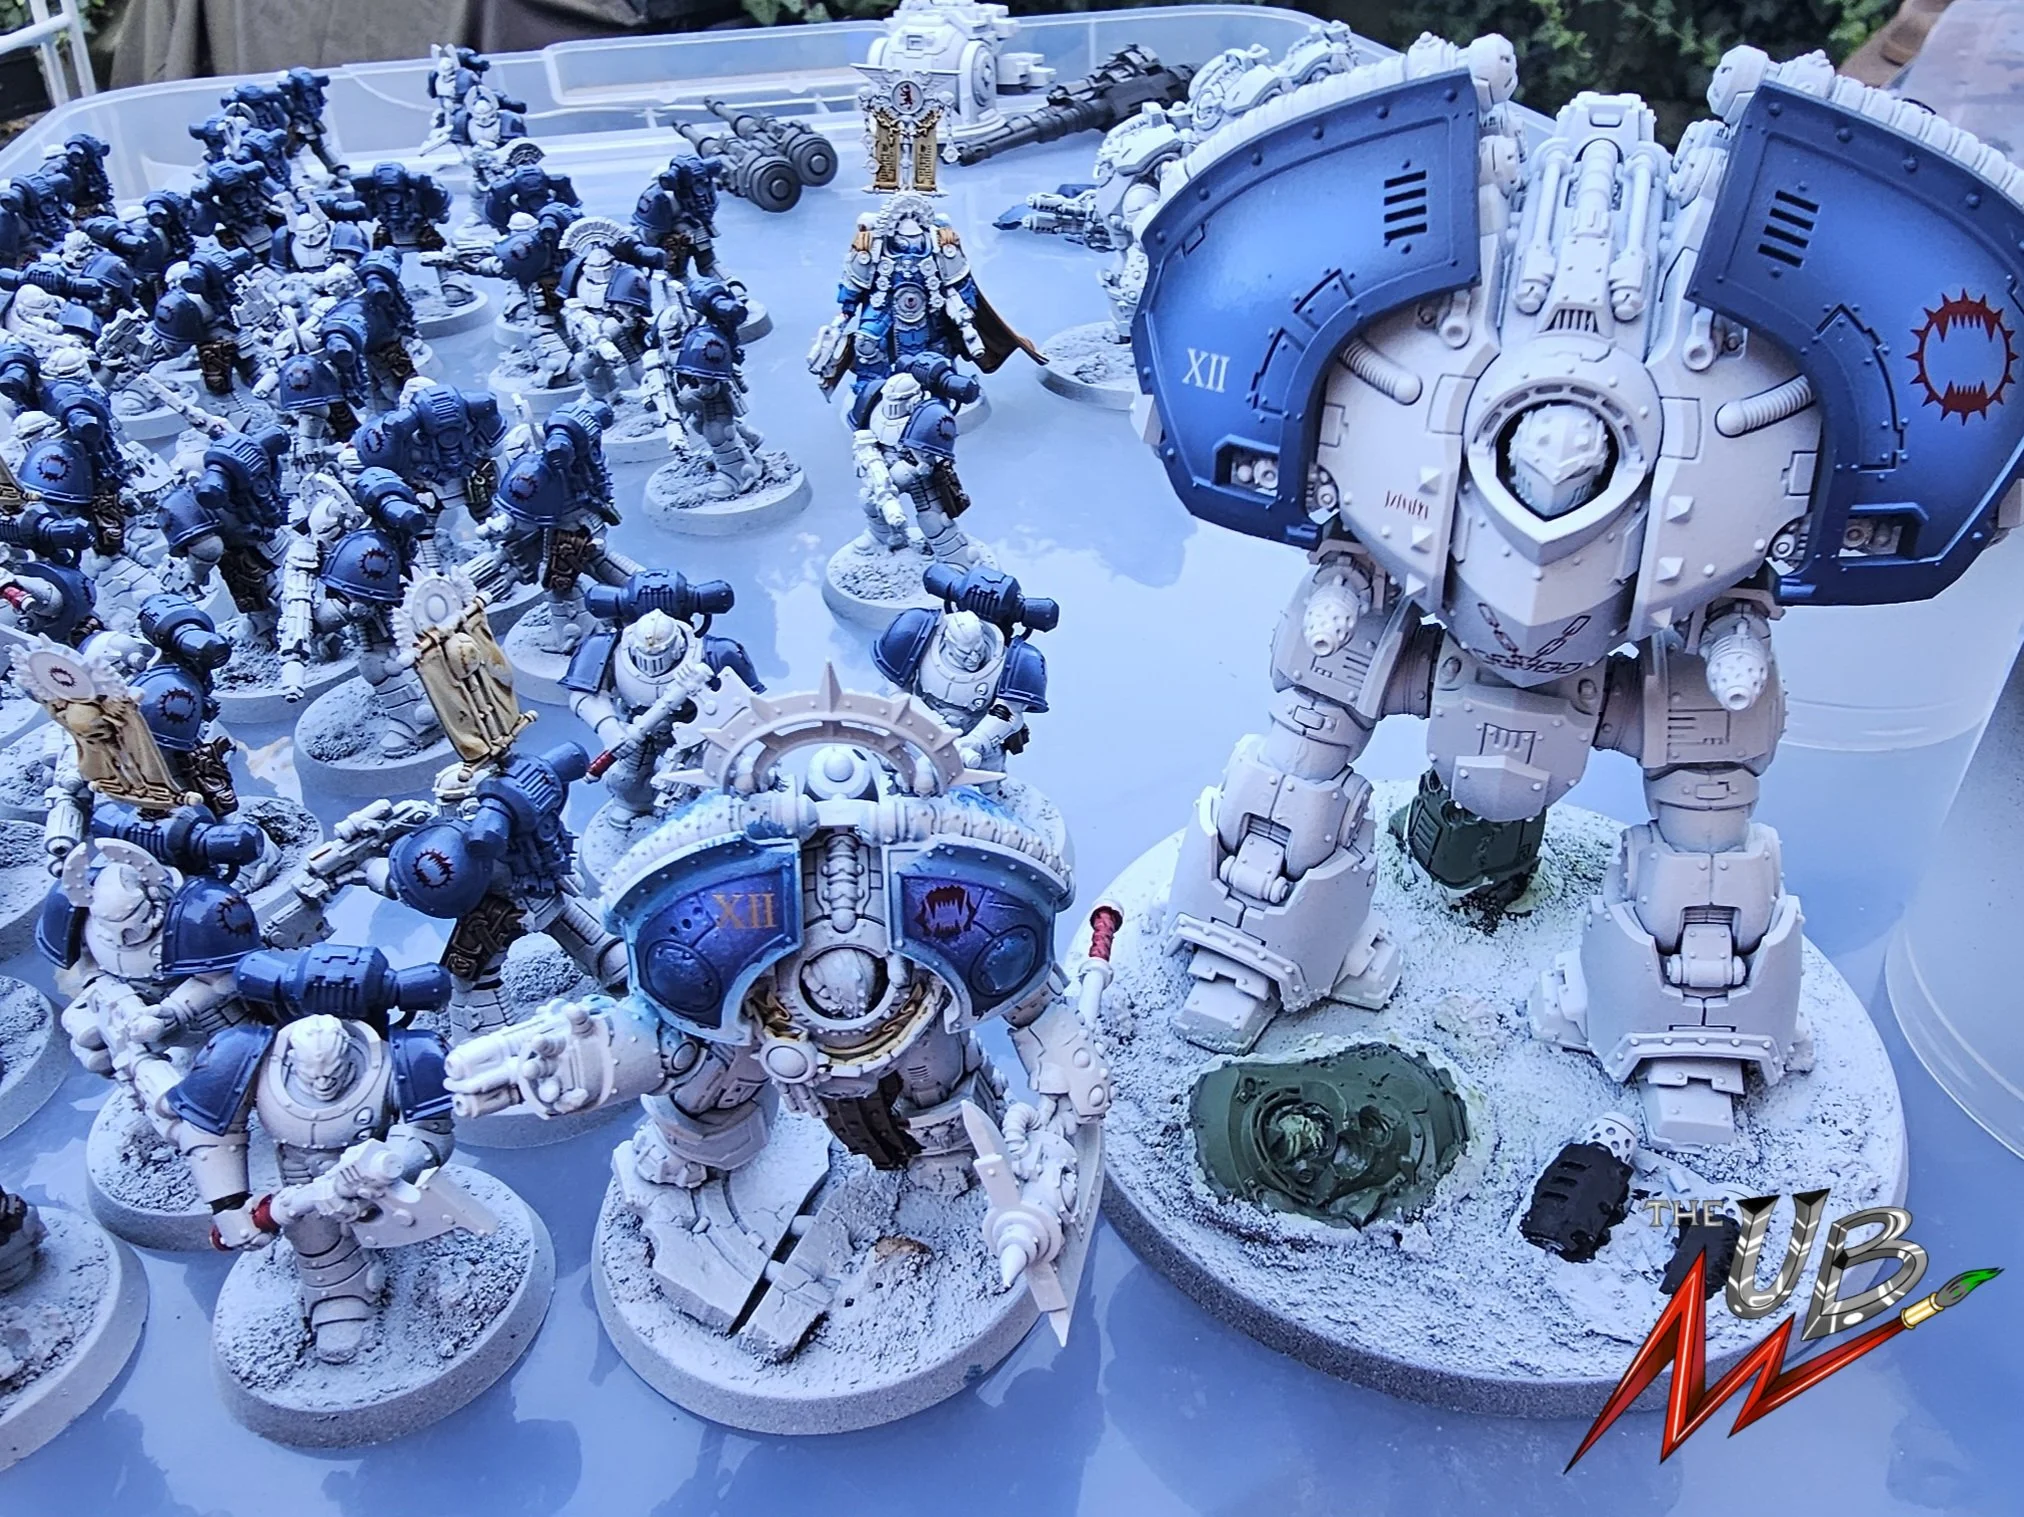
It was at this stage I Decided to call it on day 1 of the challenge. 50 models base coated, oil washed and ready for what I knew would be the hardest bit. Solid and constant brush work for metallics.
Check back tomorrow for article #2 and day #2 of painting my entire Saturnine box set over a weekend!
Did you enjoy this article? Amazing if so! You can support me with minimal effort (You lazy sod) by heading over to my socials and chucking us a follow/like/comment as you see fit:
www.instagram.com/the_unrelenting_brush
www.facebook.com/theunrelentingbrush
www.theunrelentingbrush.co.uk
Peace!
Chris