
SATURNINE CHARITY PAINTING CHALLENGE - (PART TWO) DEPLOY THE LEGION!
PART ONE HERE
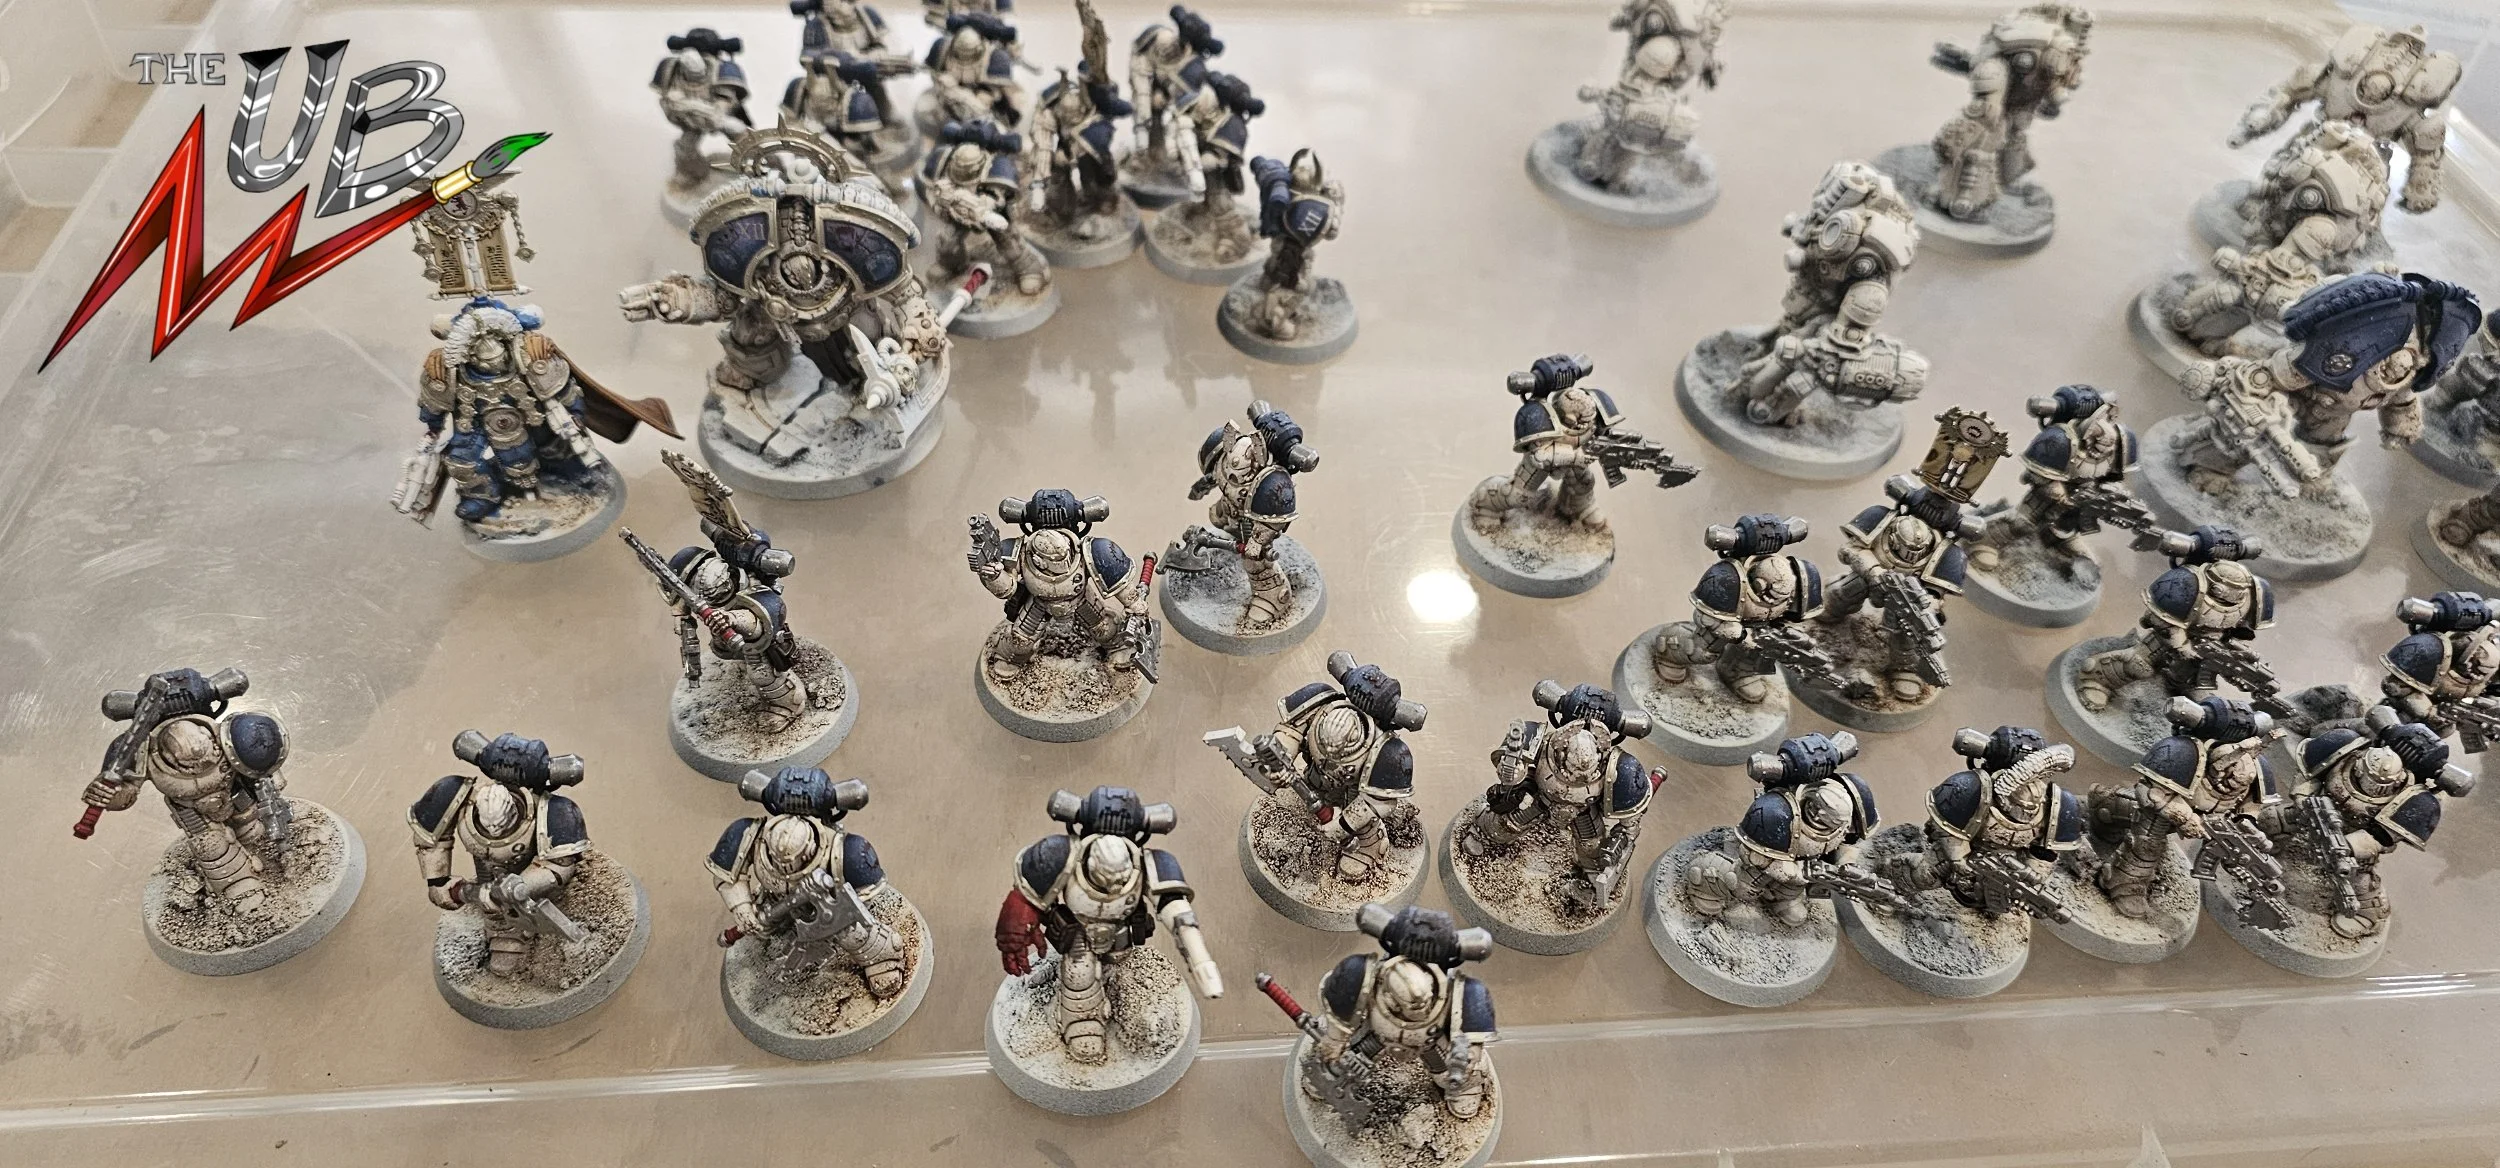
The sun rises on day two, and the back has been broken across our two main Legion colours. Day two was always going to be the greater challenge than day one. What we got sorted with rattle cans, minor airbrushing and broad applications of oil wash is now to become tackled precision, copious amounts of brush on my work and the important steps on getting an army looking like an army.
So, ensure that your breakfast was hefty, your fridge and kettle are loaded and your path to the bog is clear, and let this feat of focus, efficacy and Astartes levels of dedication come to life!

Oils dried, shine be gone!
We left off our army drying overnight, after removing our messy and slap-happy applicationa of an oil wash (see previous article) with a sponge and sparing amounts of white spirit. This should have dried completely over the evening (8ish hours), which means we’re ready to apply a nice a smooth matte varnish over the lot. This will not only help secure our oil wash in place, but also help our transfers look seamless and painted on whilst also achieving a really nice, flat, uniform finish across every millimetre of power armour across the army. I used Mecha Ultra Matte Varnish through my airbrush, but you can use the Colour Forge rattle can equivalent or the Windsor and Newton version. The important step with rattle can varnishes is do a tester first. Any issue in humidity, or lack of agitation (rattling) or temperature could see your models frost up, and ruin everything we’ve done so far. Thus, even if it’s just over a black base, DO A TESTER!
Apply lightly in pulses of sweeping dusting motions covering every angle of the model so we lose every glossy surface to our nice unified matte finish.
The reason we do this now before we do our metallics is so that we don't mute our metallic colours later once applied. It helps our textures seperate and add more visual interest to our models.
From here, I then did some light sponge chipping across our surfaces. Using Monument Hobbies Pro Acryl Paints for this step means their matte finish ties in with the varnish we’ve just done. I used Blue Grey to very lightly stipple some some chips on all the blue elements (shoulder pads and power packs). Less is more with this, and ensuring you make some scuffs over the transfers adds to the realism of real time weathering. I then did the same thing across all white armoured surfaces using Dark Umber from Pro Acryl, focusing this on the sharp angular edges of all armoured elements, and adding bits to the blue segments too. Do this very VERY sparingly, we don’t want to turn the whole things brown/tan. Less is most definitely more.

AS PAINFUL AS THE NAILS. BASE COATING ALL THE METALLICS.
I was really amping myself up for this all weekend up to this point, as I knew full well that this is where hobby souls are broken. Base coating the same steps, by hand, across 50 models of varying loadouts and amounts, was going to suck. But, it has to be done. I decided to start with the lesser of the two evils which was the trim. The box has very little of it. Not as little as the previous Age of Darkness box, but WAAAAYY less than modern Chaos Marine kits. Silver linings! Or in this case, brass.
I decided ahead of this project to take some Army Painter Warpaint Fanatic paints for a spin as I was on the scout for some new metallics to try out. Up to this point I was almost exclusively base coating with Monument Hobbies Pro Acryl, but fancied a change.
Using AP True Brass, this covered wonderfully over an application, with a second very thing application just to get it where I want it. It took a couple of hours to sort but once done I was really happy with the solid strength in colour and the metallic shimmer it was providing. I then gave every Brassy bit of trim a light cost of Brown Wash from Monument Hobbies Pro Acryl, and would come back to highlight this layer once dry.
Up next, the proper PROPER shift of the effort. Base coating every weapon, tube, rubber panel, cable, joint, servo, haft, pommel… I predicted this taking 1/3 of the day at least. So, stopping my bitching, I sat down and got on with it.
For this, I used Army Painter Fanatic Gun Metal and was once more really happy with how this paint flowed, applied and dried. I took breaks across every 20 MKII marine to keep me sane, cleaned my brush every 10ish minutes and went back over everything twice with thin layers for the nice smooth quality finish I wanted. My back was wringing by the end of this! Nonetheless, with this done, the single biggest elements of the army had been painted. The tubing in between the pads of the Dreads and Terminators I painted in Dark Iron Bronze from Army Painter, to break things up and add a bit more interest. This took about 15 minutes.
I had a quick snack break thanks to the beautiful Unrelenting Wife who’d done a scran run for me knowing I was up against it and likely not going to be eating much through the rest of the day.


Once certainly dry, I went over all Gun Metal elements with Black Wash from Pro Acryl to knock it a bit and build some depth between components. You’ll notice that bolter casings and axe heads are all base coated silver. They’ll be painted black shortly.
Once our shades are dry, it’s time to lighten up our metals. This is a far simpler (if arduous en mass) step than what we’ve been up to today already. Using AMMO MIG Light Silver Drybrush paint, and a long and narrow headed drybrush, I tickled all the metallics for a nice sharp and shiny effect across the details of all our metallic details. This includes along the sharper long curved edges of our shoulder pad trim.
You can use other brands or selections of bright silver for this, but I adore this MIG paint. It’s used in virtually every project I work on. Go grab some and try it out.

ONE LAST PUSH!
The end is very much in sight. The final details to tackle were few, but lots! As in, few in number, but across a LOT of dudes.
First up, weapon casing. Black Legion Contrast (or any black paint of your preference) across the casings carefully applied over our silver gets a neat solid finish where we want it against our scuffed eye-catching gun metals. A couple of neutral grey highlights along the longer edges. Done. Do this 50 times.
Up next, eye lenses. Drop a little bit of either Stirling Scorpion Green or Mantis Warrior Green in the lenses. If you spill, quickly wipe the mess away with a moistened thumb. Bosh!
Weapon glows. Whichever green you used for the lenses above, use the other for plasma coils. You can swap out green for something like Nuclear Sunrise or Plasmatic Bolt (Both Army Painter Speed Paints) for whatever your preference is. I really like green plasma, is all!
Faces. Using whatever flesh paints you prefer, mix these across your squads to your own personal taste. I really like: Dark Wood, Crusader Skin, Warrior Skin, Guilliman Flesh. All APSP or Contrast. Once these are on and dry, I apply a medium silver (Leadbelcher) carefully to the wires and nails in their heads, and across the lines of their teeth (World Eaters lose their own teeth very quickly once they’re implanted with the Butcher's Nails). I then recess shade this with Berzerker Bloodshade wash by Citadel. Five minute faces, done!
Vexillas. I draw some landscape squiggly lines simulating text in the parchment of the Vexilla using Black Brown, or Rhinox Hide if you prefer.
Sergeant helm Plumes. Blood Angels Contrast paint on these, being careful of the metallic trim and bracket they sit in. Like plasma, you can swap this colour out to taste as you see fit.
Bases. By this point, it was about 23:40 and I was feeling battered. However, we’d just hit £1000.00 on the fundraiser (thanks guys!), and I knew I’d be struggling to sleep knowing they were so close to done, so on I went!
I painted each base with Neutral Grey, and drybrushed them with Pale Yellow. Both Pro Acryl paints. I then stippled some AK Interactive City Dusy pigment over 2/3 of every base. When applying this, ensure your models are WELL clear of where you're applying on your work space, as this is super messy stuff and will get everywhere. You don't want a dusty finish on your plasma glows.
From there, the remaining 1/3 of each base had AK Interactive Dark Earth applied, and stippled to mix and bind with the City Dust already on there.
Each model then got a quick blast with a hairdryer to blow away the excess dust, and then every model got two licks of Coal Black from Pro Acryl on their base rims.
And with that…. We’re done!
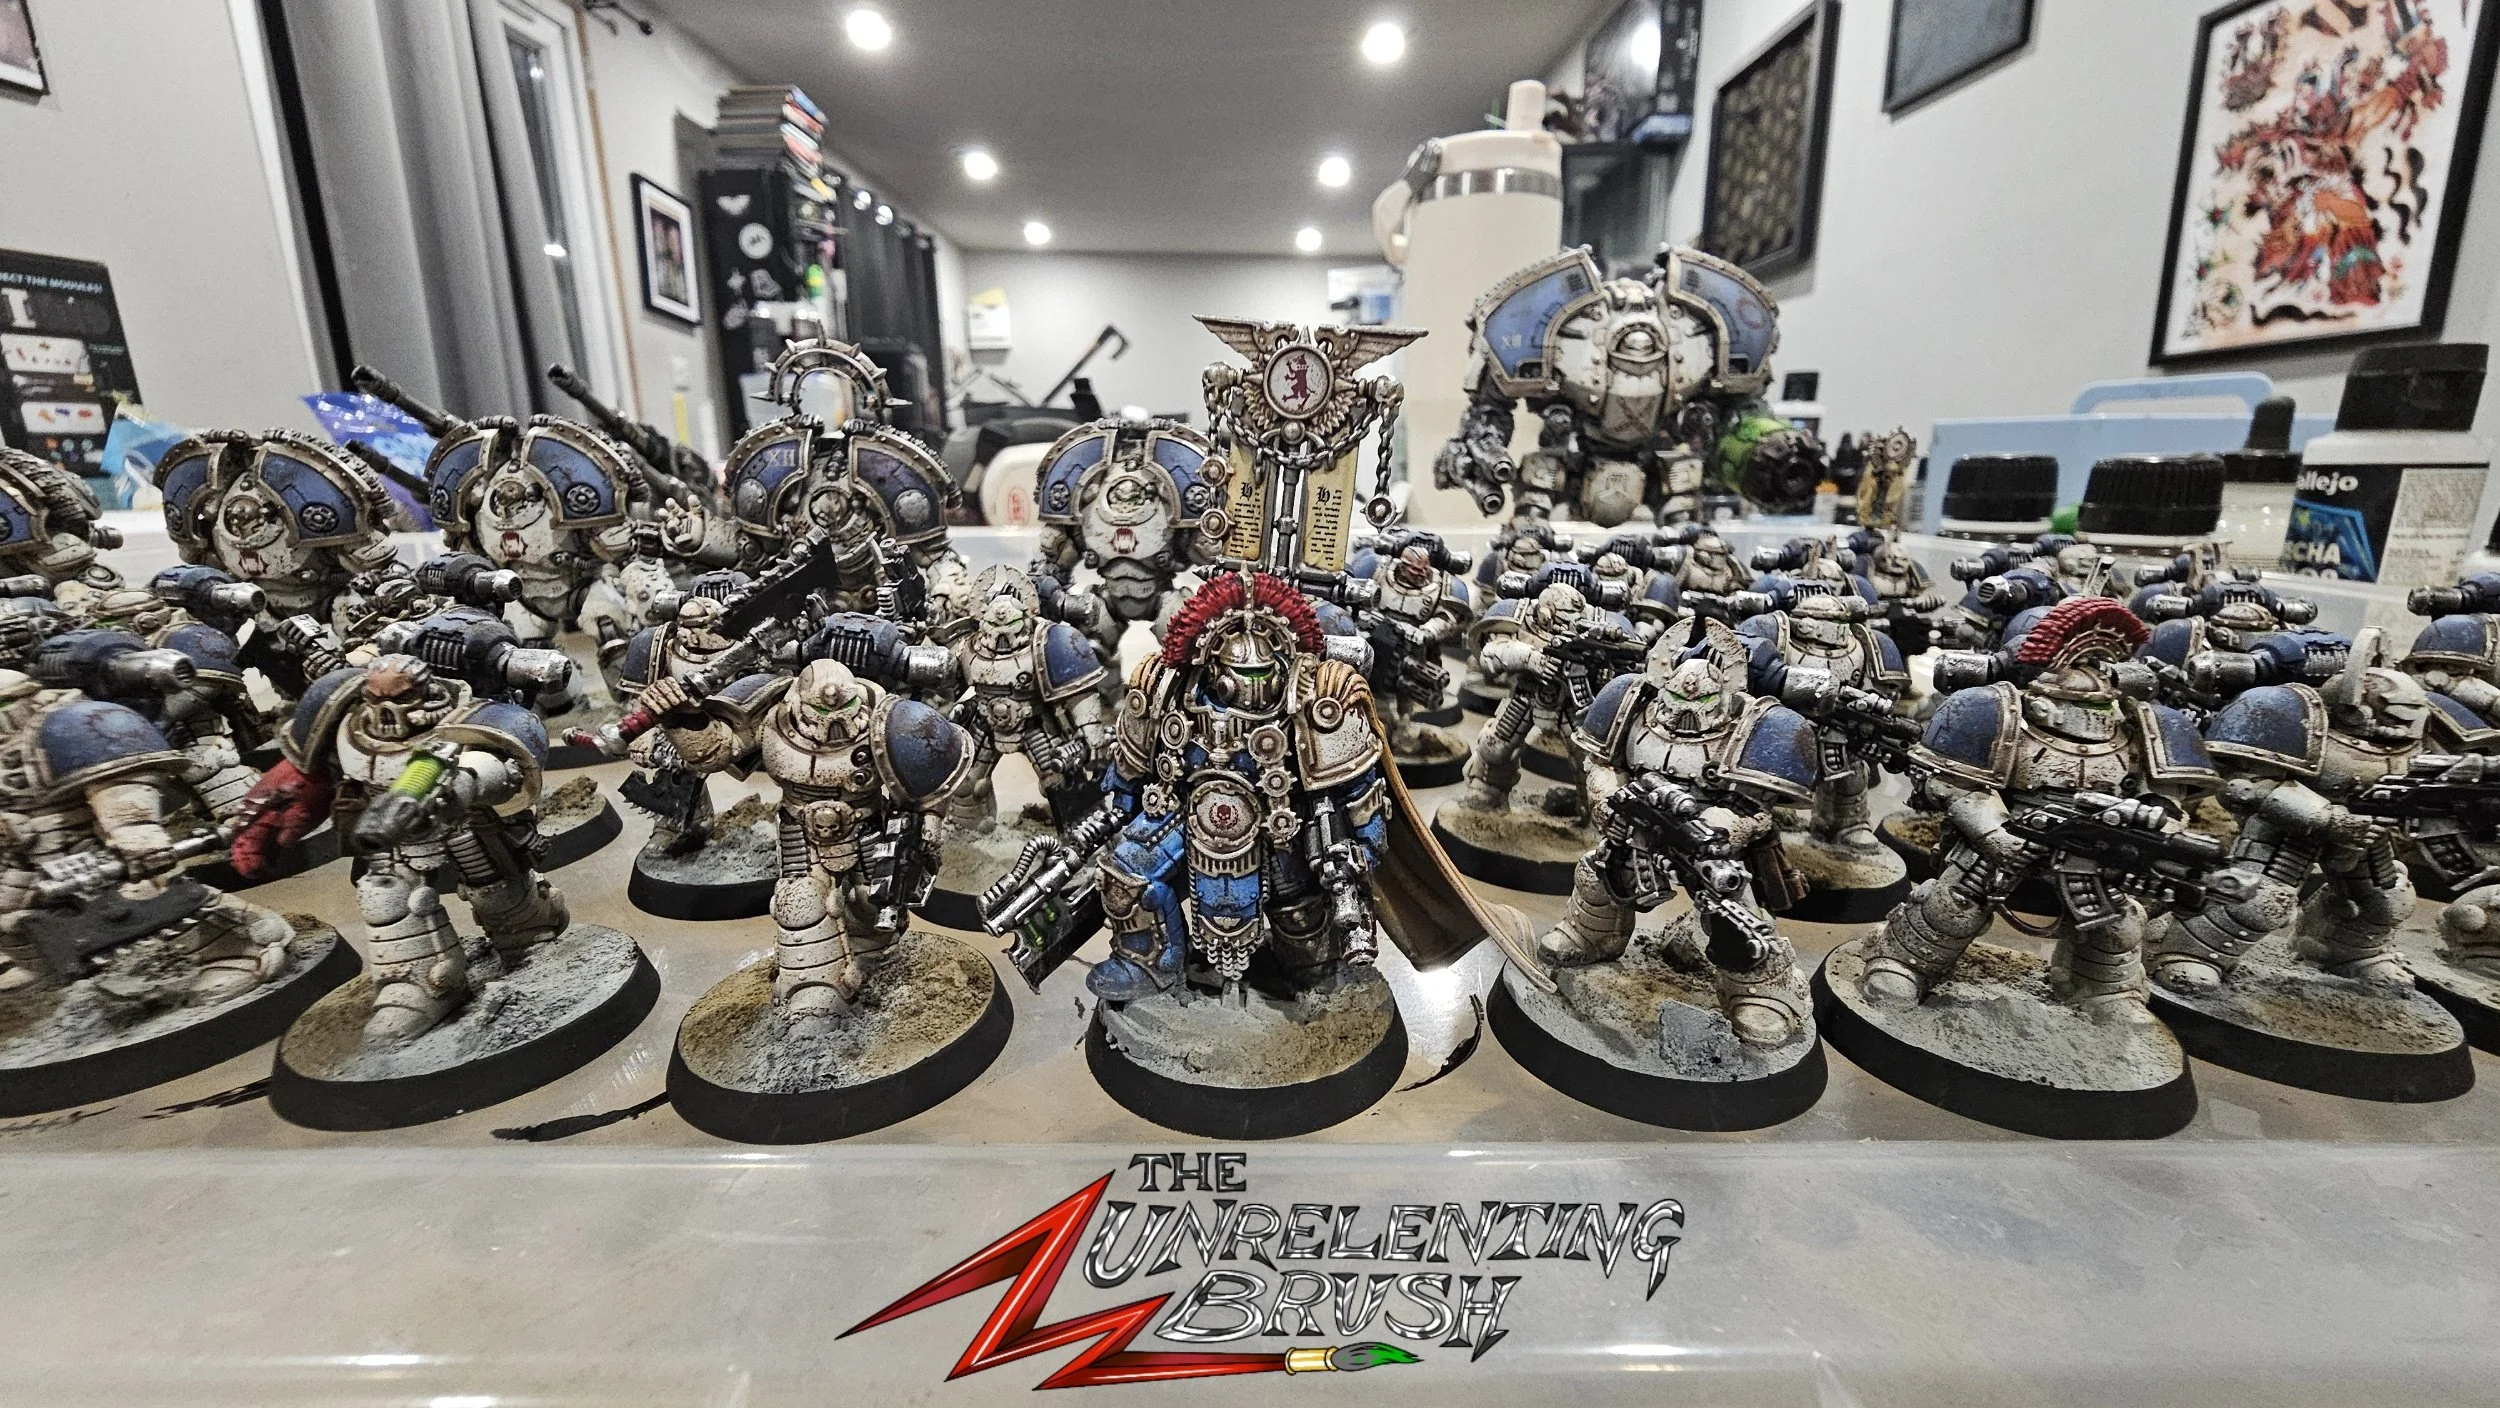


And so it goes! £1041 raised for Acorns Children's Hospice, 50 Models painted over two days (about 30 hours all in), giveaway prizes kindly donated and given away to excellent donors. All in all, a tremendously successful weekend. Thank you to everyone who was a part of it, big or small!
There are a few bits I've tweeked since this weekend. I’ve added a few more details and flourishes to characters. I’ve added some heat affects to the reactors of all the Saturnine. I’ve also got the new Dreadnought weapons to sort, after his Big Disintegrator gun nearly obliterated himself in his first ever shooting phase. But it do gotta be that way some times.
For more hobby goodness, do please be sure to check us out over on the socials:
Thanks for reading and have a magnificent rest of your day!
🤘🏻
Chris
