
SATURNINE CHARITY PAINTING CHALLENGE PREP - PRIMING AND SETUP
This venture is to fundraise for the amazing charity that is Acorns Children’s Hospice and the incredible work and support they offer to families and children in need. You can find the Justgiving page here, to donate and spread the word throughout your hobby groups. Thank you!
The day shall soon dawn! The army is built, or sub built, which is half the battle for getting this event underway. From here, the focus is on laying down our predominant colours with rattle cans, ensuring we're setup for the day and that we have everything we need for the day to have a hopefully very smooth weekend of solid and effective painting.
50 models (An entire army) in a weekend? Go on then!
Now, I don’t know many other painters (Or… any other painters) who attempt feats such as this as semi regularly as I do, that being painting an armies worth of minis over a short intense time frame. However, everything I’m practicing over this endeavor consists of countless nuggets of hobby wisdom, decades of experience and the tactics of a professional army painter. Their WILL be something in here that you’ll be able to take away and apply to your own (Much more sane) personal hobby ventures.
So check it out! and I hope you enjoy this diary of a madman…
PREBASING - MORE NOW, LESS LATER.
As you may have noticed, my models bases are pre textured before priming. This is for a couple of reasons:
There’s nothing more momentum killing when nearly finishing a project than waiting for base slop to dry, which can be hours, or ideally overnight.
Texture paint used exclusively can be very expensive. Those pots go far, but we’ve all been there scraping the bottom of the pot with a tooth pick getting the drags out with 2 bases left to do. Mix it up with some rubble/shredded cork, fine sand AND texture paint.
This makes for a far more interesting, and much more realisitic finish for our minis.
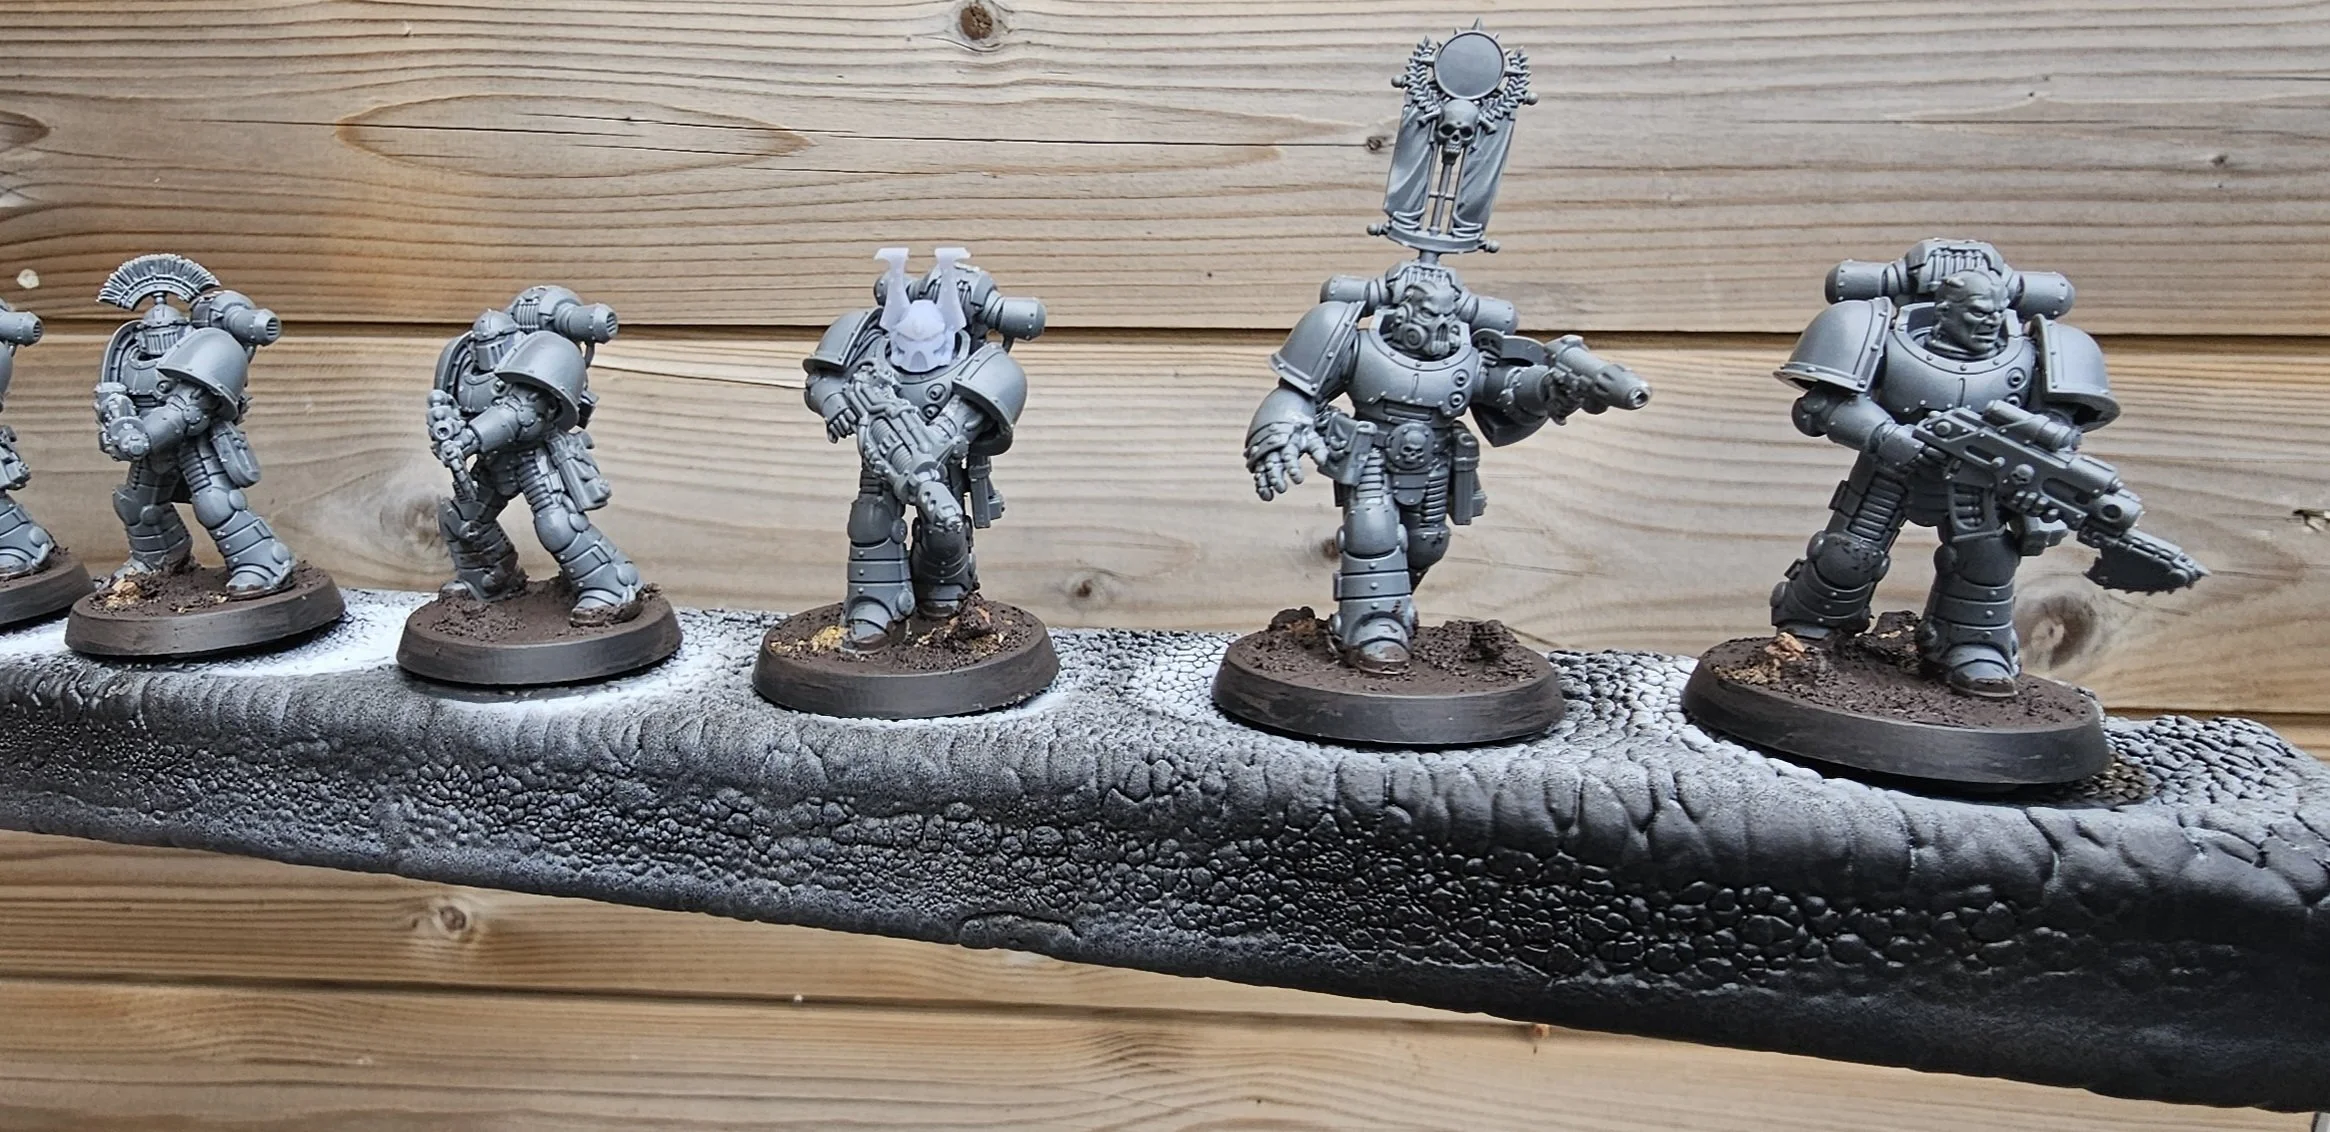
So, I do this once the model is built and ready to go. I place down any large bits of decoration that is suitable for the base, without taking away from the model on the base (See the annhilated Contemptor on my Dreadnoughts base, courtesy of the wonder 3d Game Shop Ltd on Instagram). When this is done, I apply blobs and little zags of superglue in random spaces and patches on the base. I then quickly apply a few ‘blocks’ of shredded cork by Army Painters Battlefield range, keeping then central(ish) in our glue puddles. Then, while still wet, I carefully dunk the base in to my box of mixed fine sand (Carefully so we don’t lose our cork). I give it a good shuffle ensuring it’s all covered, then take it out, tap off the excess and blow off any fine dust or stuck loose sand where I don’t want it.
This dries super quick thanks to the fine sand and dust that causes the super glue to dry rapidly. You can always blast it with activator to be sure if you’d like.
Then, when dry, I apply a thin amount of texture paint over the remaining base top that needs decorating. You don’t need to apply heaps, just enough to ensure there’s no black of the base showing. I use Astrogranite or Stirland Mud (GW), but you can use whatever you like (The colour doesn’t matter, as It’s gonna get primed anyway. The affect is the important bit).
Let this dry, and our bases are set! I tend to do this the night before a big painting day just to be sure it’s all ready to and cured for priming.
PRIMING - THE KING OF RATTLERS

The absolute hero’s of The Colour Forge very kindly sent me out a 3 pack of their rattle cans you can see above. I’ve been using Colour Forge for years now, and am proudly affiliated with them within the studio of Team UB. They’re the biggest, best quality rattle can on the market, with an extensive range for all your hobby projects! Go give them some love, and ensure you hassle your FLGS to stock/restock this mega product sharpish.
So, “3 Cans Chris? Are you tapped? Do you have someone who looks after you? It’s a bit excessive innit?”. False! Know-it-all of the internet!
3 cans enable us to achieve a 3 part zenithal prime across our models. The Black is our deepest shadows, and is sprayed all over our project, especially on the underside for the recesses where little colour will end up. The Standard Grey is our mid tone, and is sprayed from 90/45 degrees over our project. This keeps the black shading untouched while lifting up our higher surfaces. White is then used entirely top down for our strongest highlight. For this project, I went a lot stronger with the white due to the sheer amount of white power armour across the whole project. You can yourself tone this down for a more gradual transition of black to grey to white. I use this techniques on 99.999% of the projects I paint for myself and for clients. It is far more effective and time safe than individually airbrushing each individual model (At the loss of more targeted highlights, but we’re building Rome in a day here…. well… two.). This works fantastically for speed paints/contrast too, as your colours get natural dark to light gradients when applied thanks to this application of primer.
If you have to skip a can, you can bypass the grey and stick with white and black. But, Colour Forge often do a 3-£30 offer on their cans, which means you get 3 larger cans for the price 2 smaller ones from another popular brand of rattle can. It’s well worth it, even if you get a top up of 3 black cans to see you through the coming months.
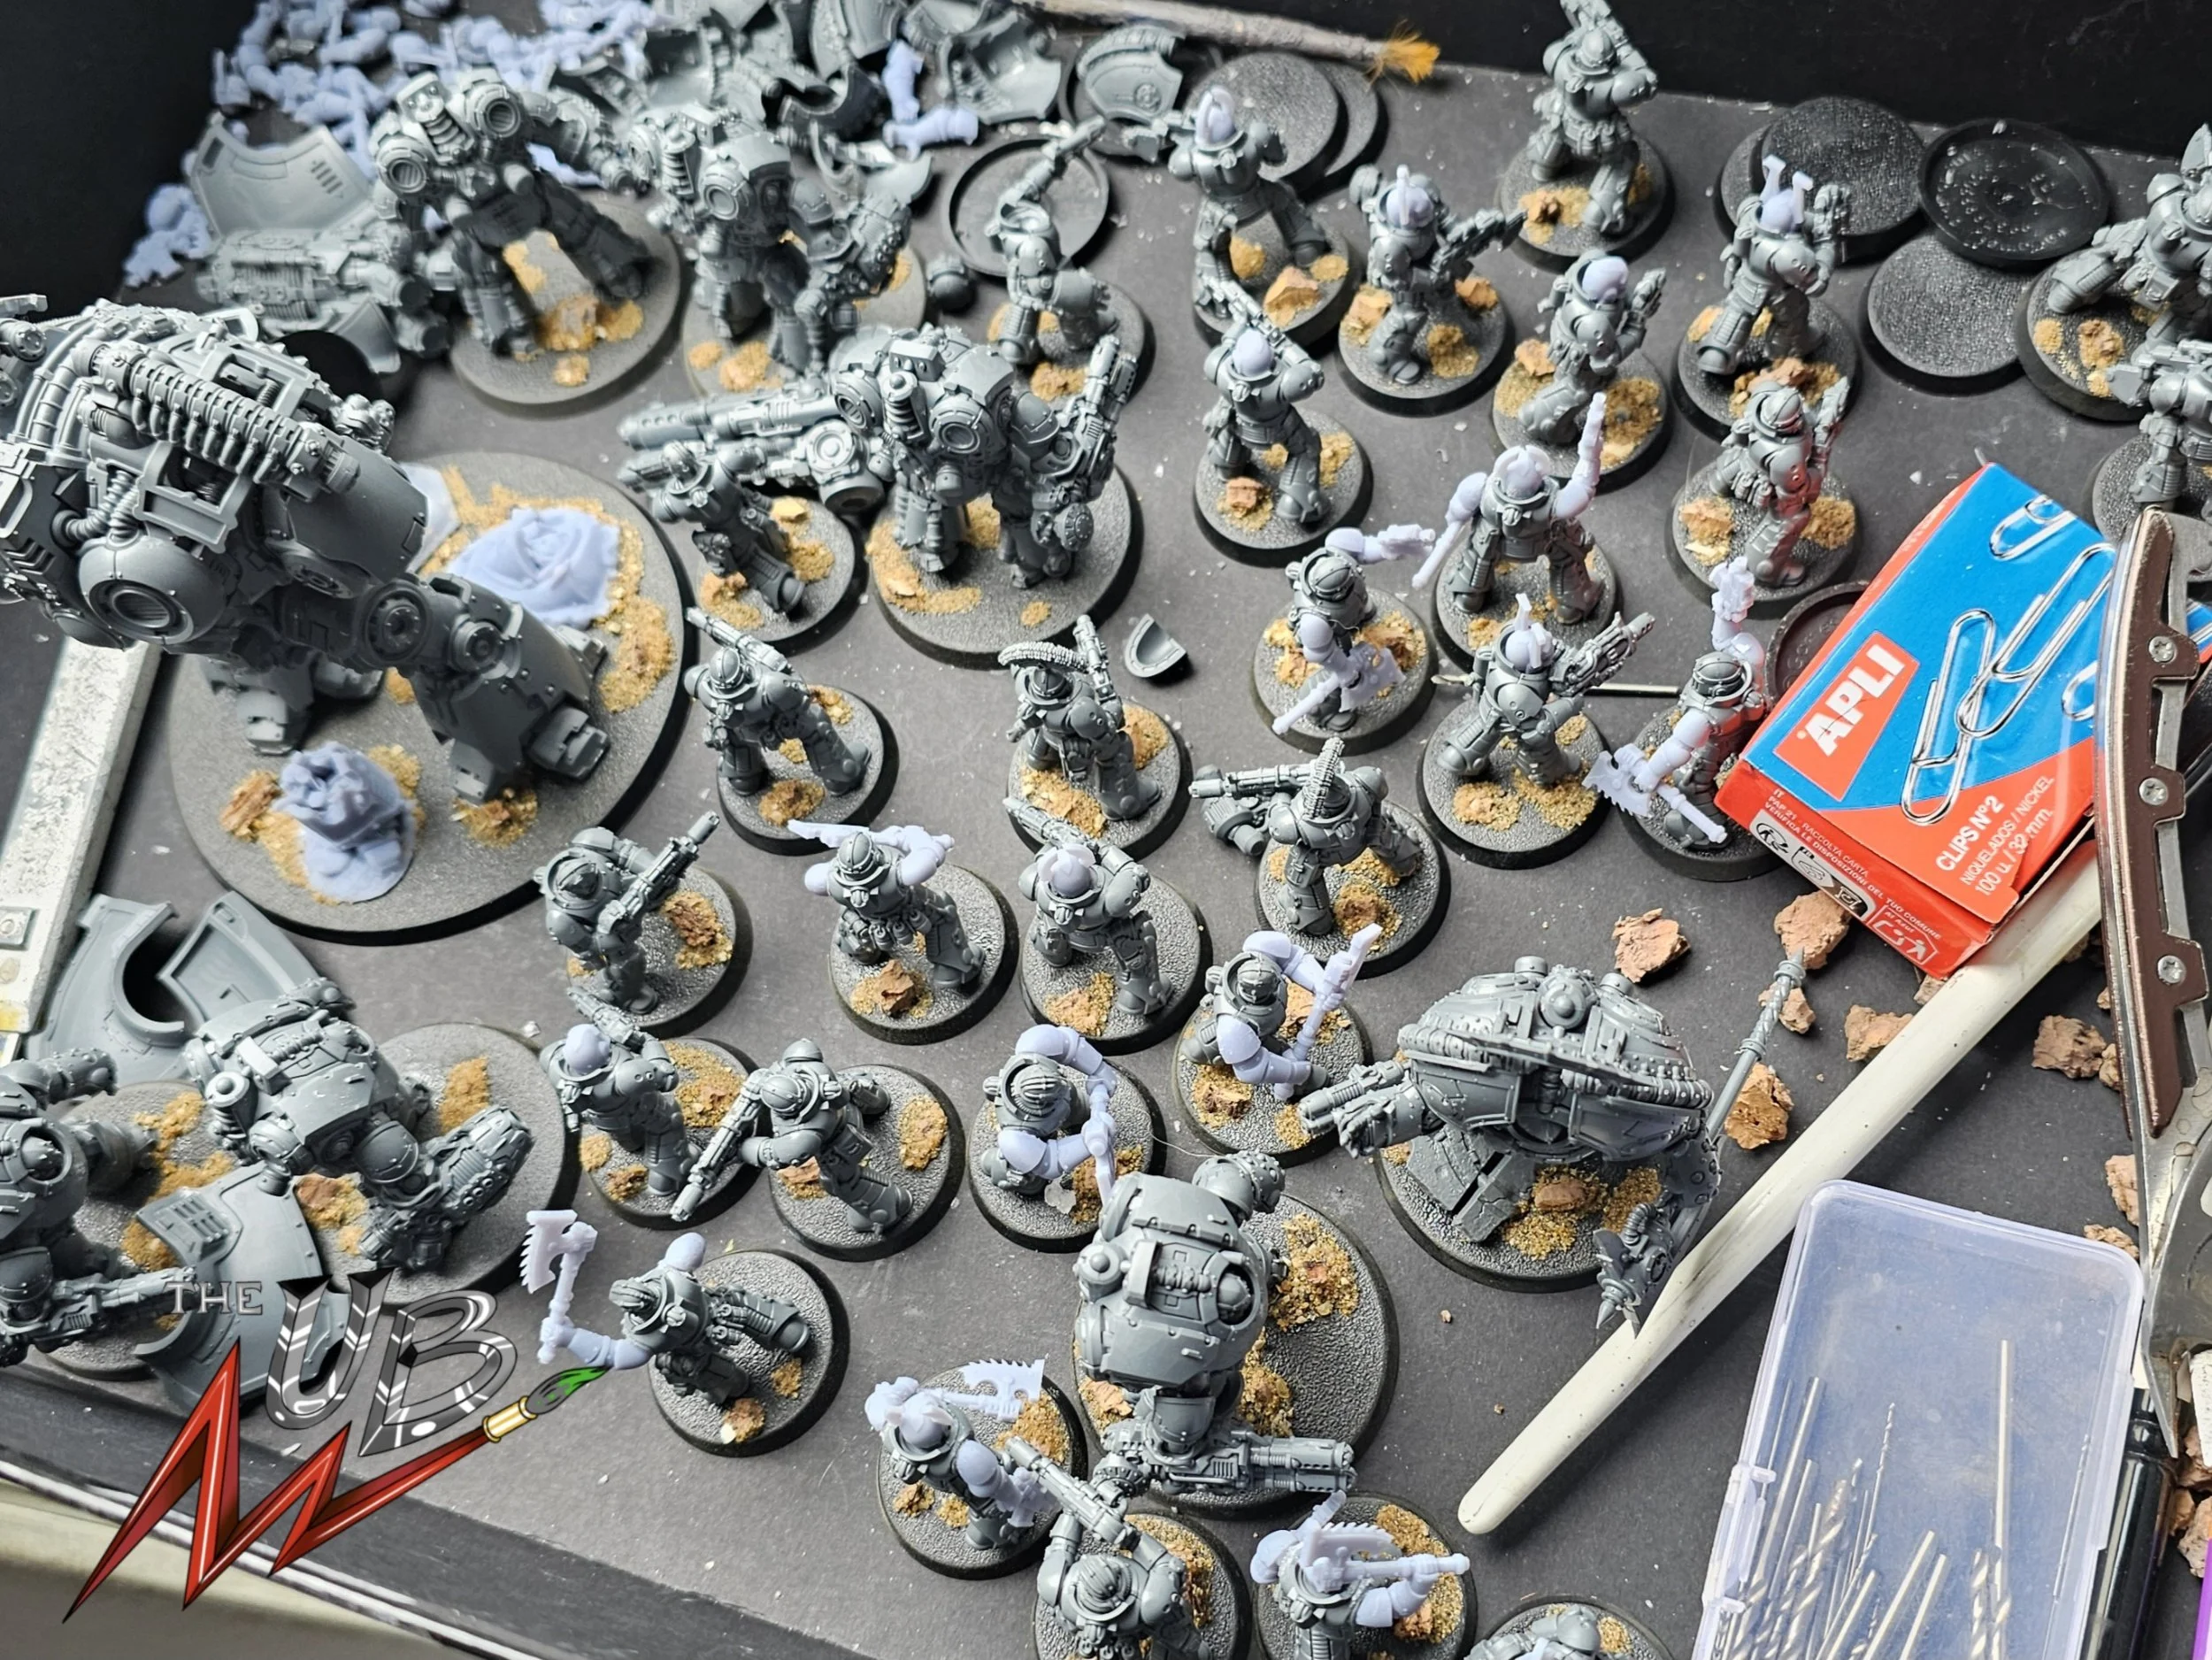
At this stage, you can get a really good look at the texture on the bases. It (to me at least) reflects a rubble and ash strewn battlefield whole heartedly. And because it’s primed like our marines, if you’re careful, you can whack a speed paint and a drybrush down and they’re done! Black scorched earth of Istvaan V? Done in minutes. A dusty and ash strewn cityscape? Some grey and brown pigments, sorted. It’s a great canvas to be creative on!

We’re primed! And ready to go. Drying time between layers you want to be between 15-30 minutes. It’s been quite warm this week so leaving my spray stick outside means they dried super fast, saving me some time!
After spraying all 50 minis I’ve barely made a dent in any of the 3 cans! They could easily do 2 or 3 more loads of this type of project. Superb value for money.
SUB ASSEMBLIES - MAKING LIFE EASIER!
I bloody hate sub assemblies. I always get terrified I’m going to lose something, or that it won’t fit where it needs to, post painting, because of some building balls up. But! If you read the last article, you’ll see where I had dry fitting bits set up to prevent such issues. Proactive, not reactive!
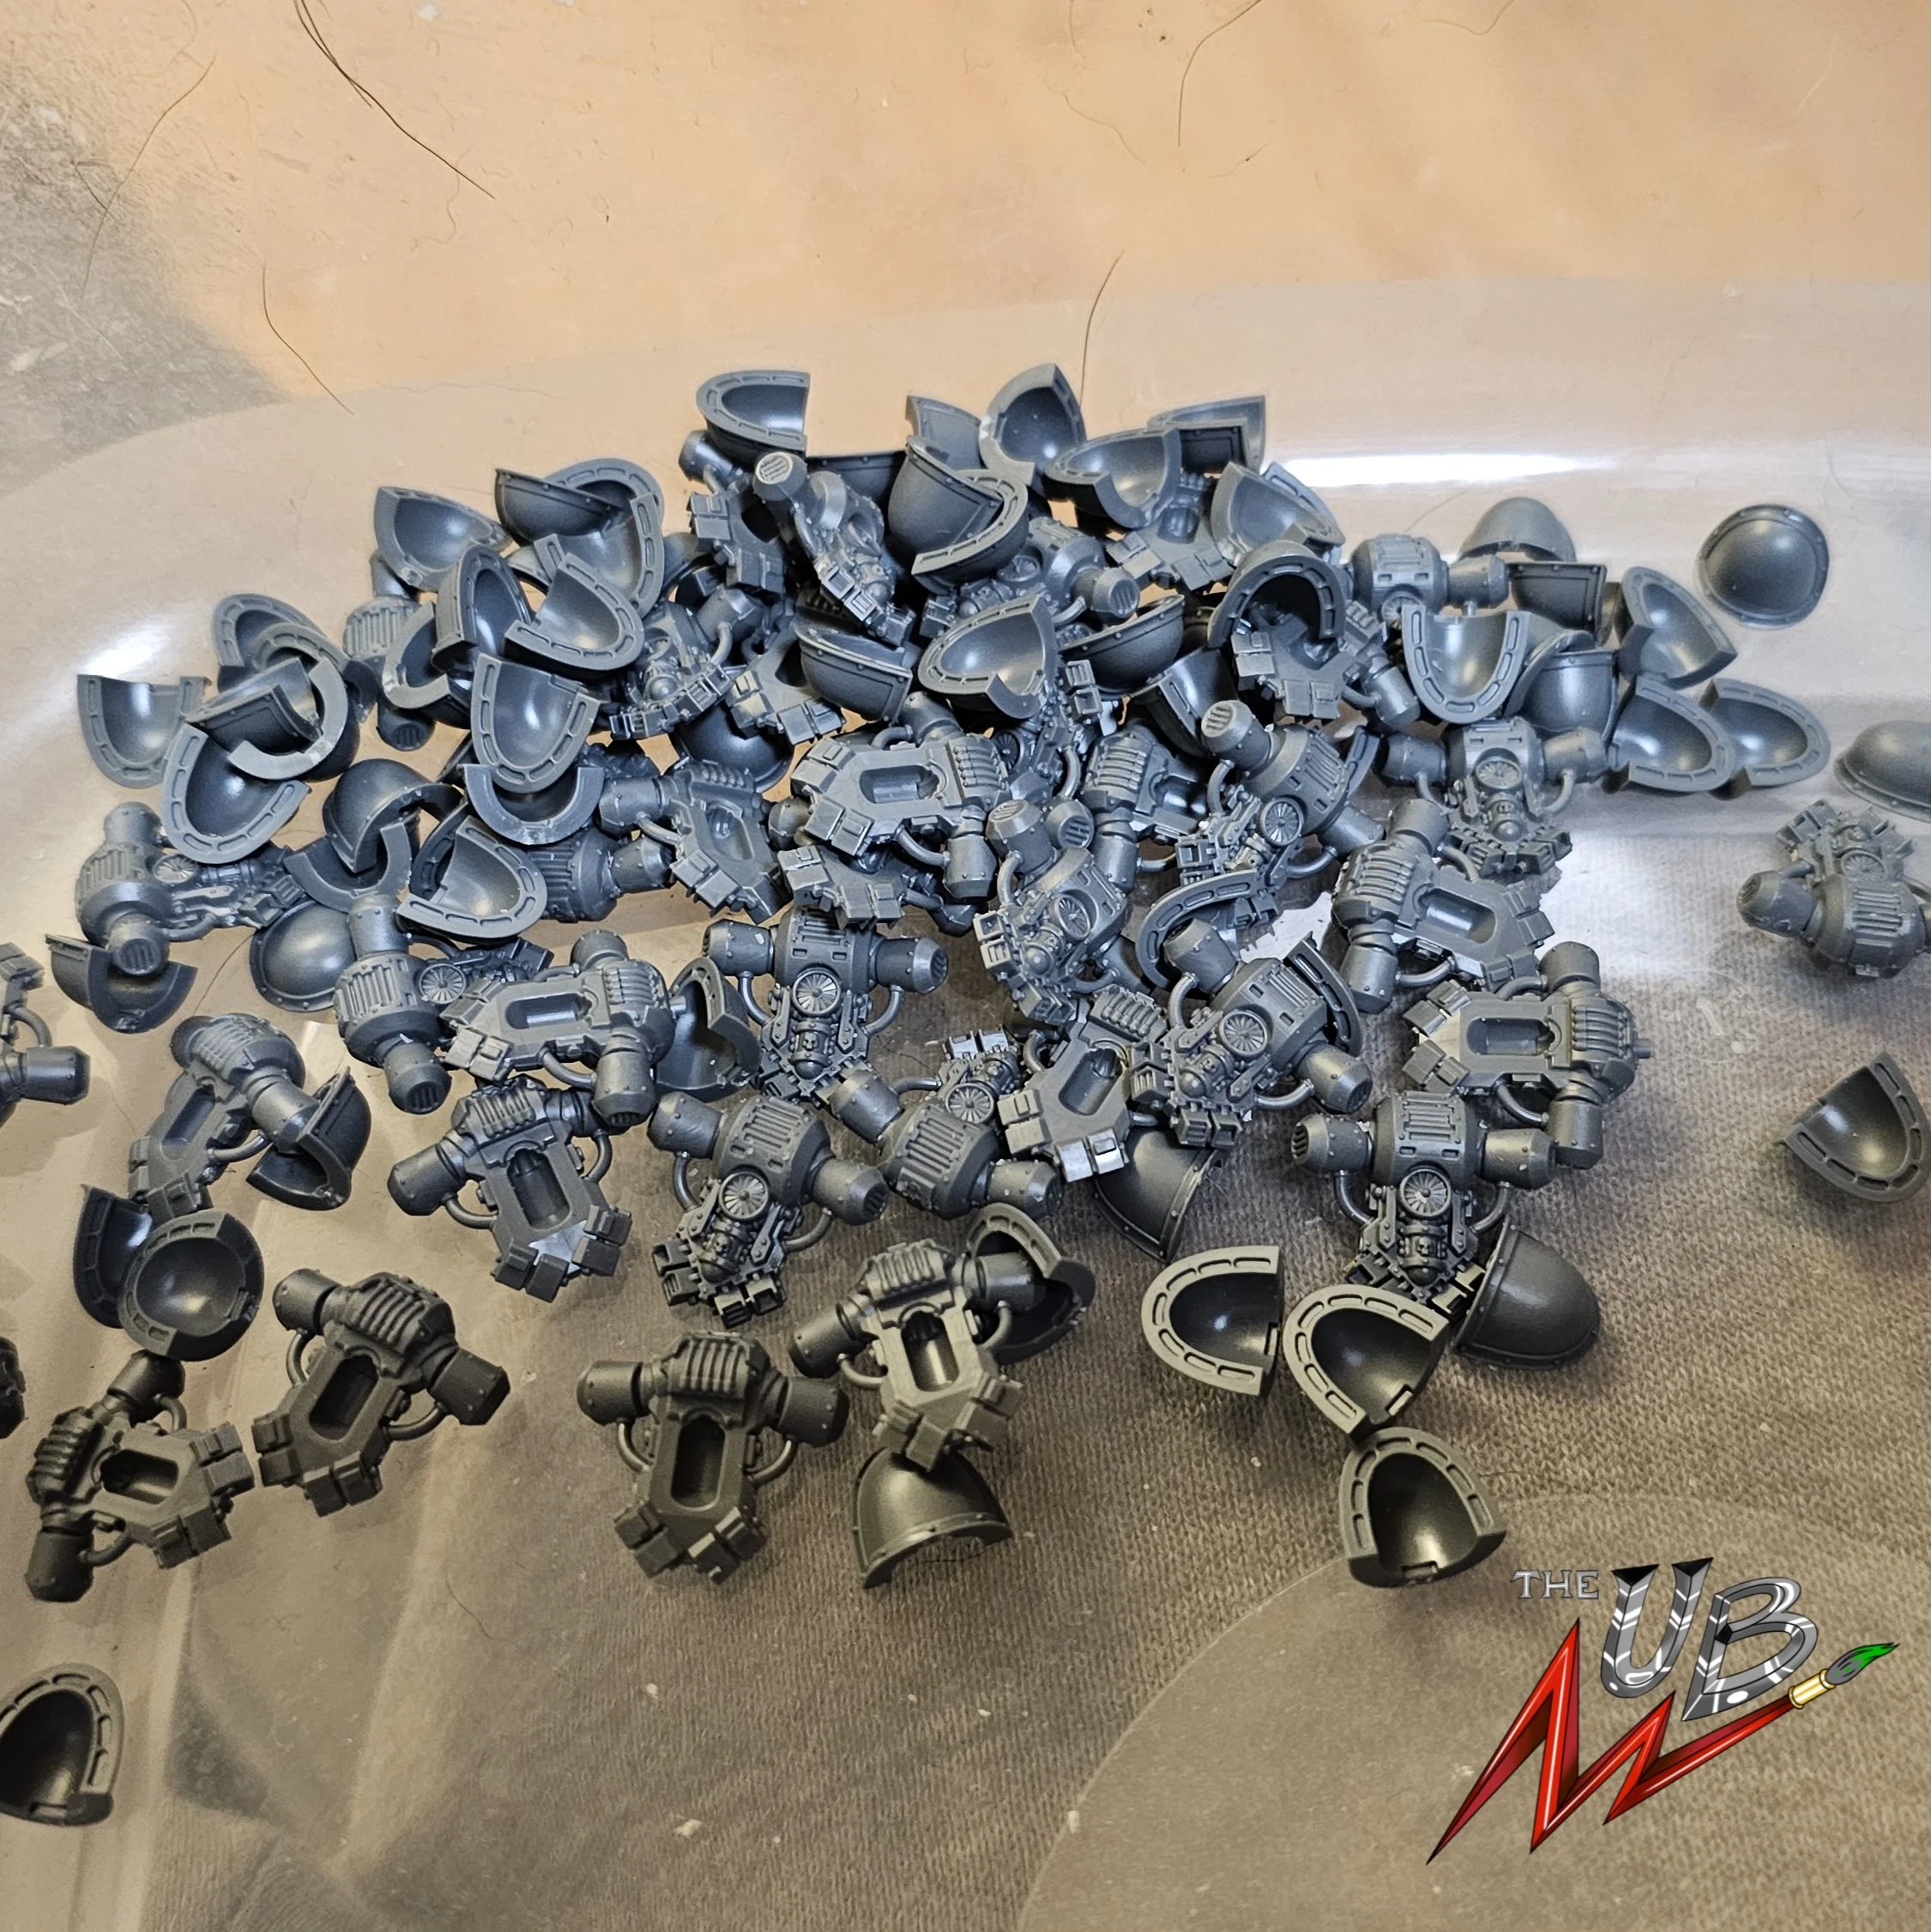
There’s only really 1 major sub assembly for this projects, and thats the marines with their shoulder pads and power packs. I blu tac’d these on to the marines initially for the black all over prime. Just to ensure that was consistent over everything. I then removed them from the marines, and using double sided sticky tape, I attached them to strips of cardboard I cut off a box. I kept these in splits for:
40x Pads for World Eater Legion Icon
10x Pads for Tactical Icon
10x Pads for Tactical (Despoiler) Icon
10x Pads for Legion Numeral (Disintigrator Squad)
10x Pads for Heavy Support Squad (Multi Meltas)
I also threw in the pads for the Saturnine Terminators and the Saturnine Dreadnought.
The Power packs were blu tac’d on the corner of my spray stick to ensure I could spray their front and back effectively without removing and flipping.
I sprayed these lightly with Tempest Blue (Also from Colour Forge). These are now all ready for the weekend to be painted!
For the Arachnae Quad Accelerator Cannon, I kept the guns off the canopy, and kept that off the legs. I sprayed the canopy as above with the marines (Black/Grey/White) and the guns and legs with Soulforge Steel (From Colour Forge, again).
And with that, our project is primed and ready to go! So lets move on to preparing our setup. After all, the 5 P’s are important for such hobby acts of hectic heroism (Proper Preparation Prevents Piss Poor Performance).

WORKSPACE - SET THE STAGE!
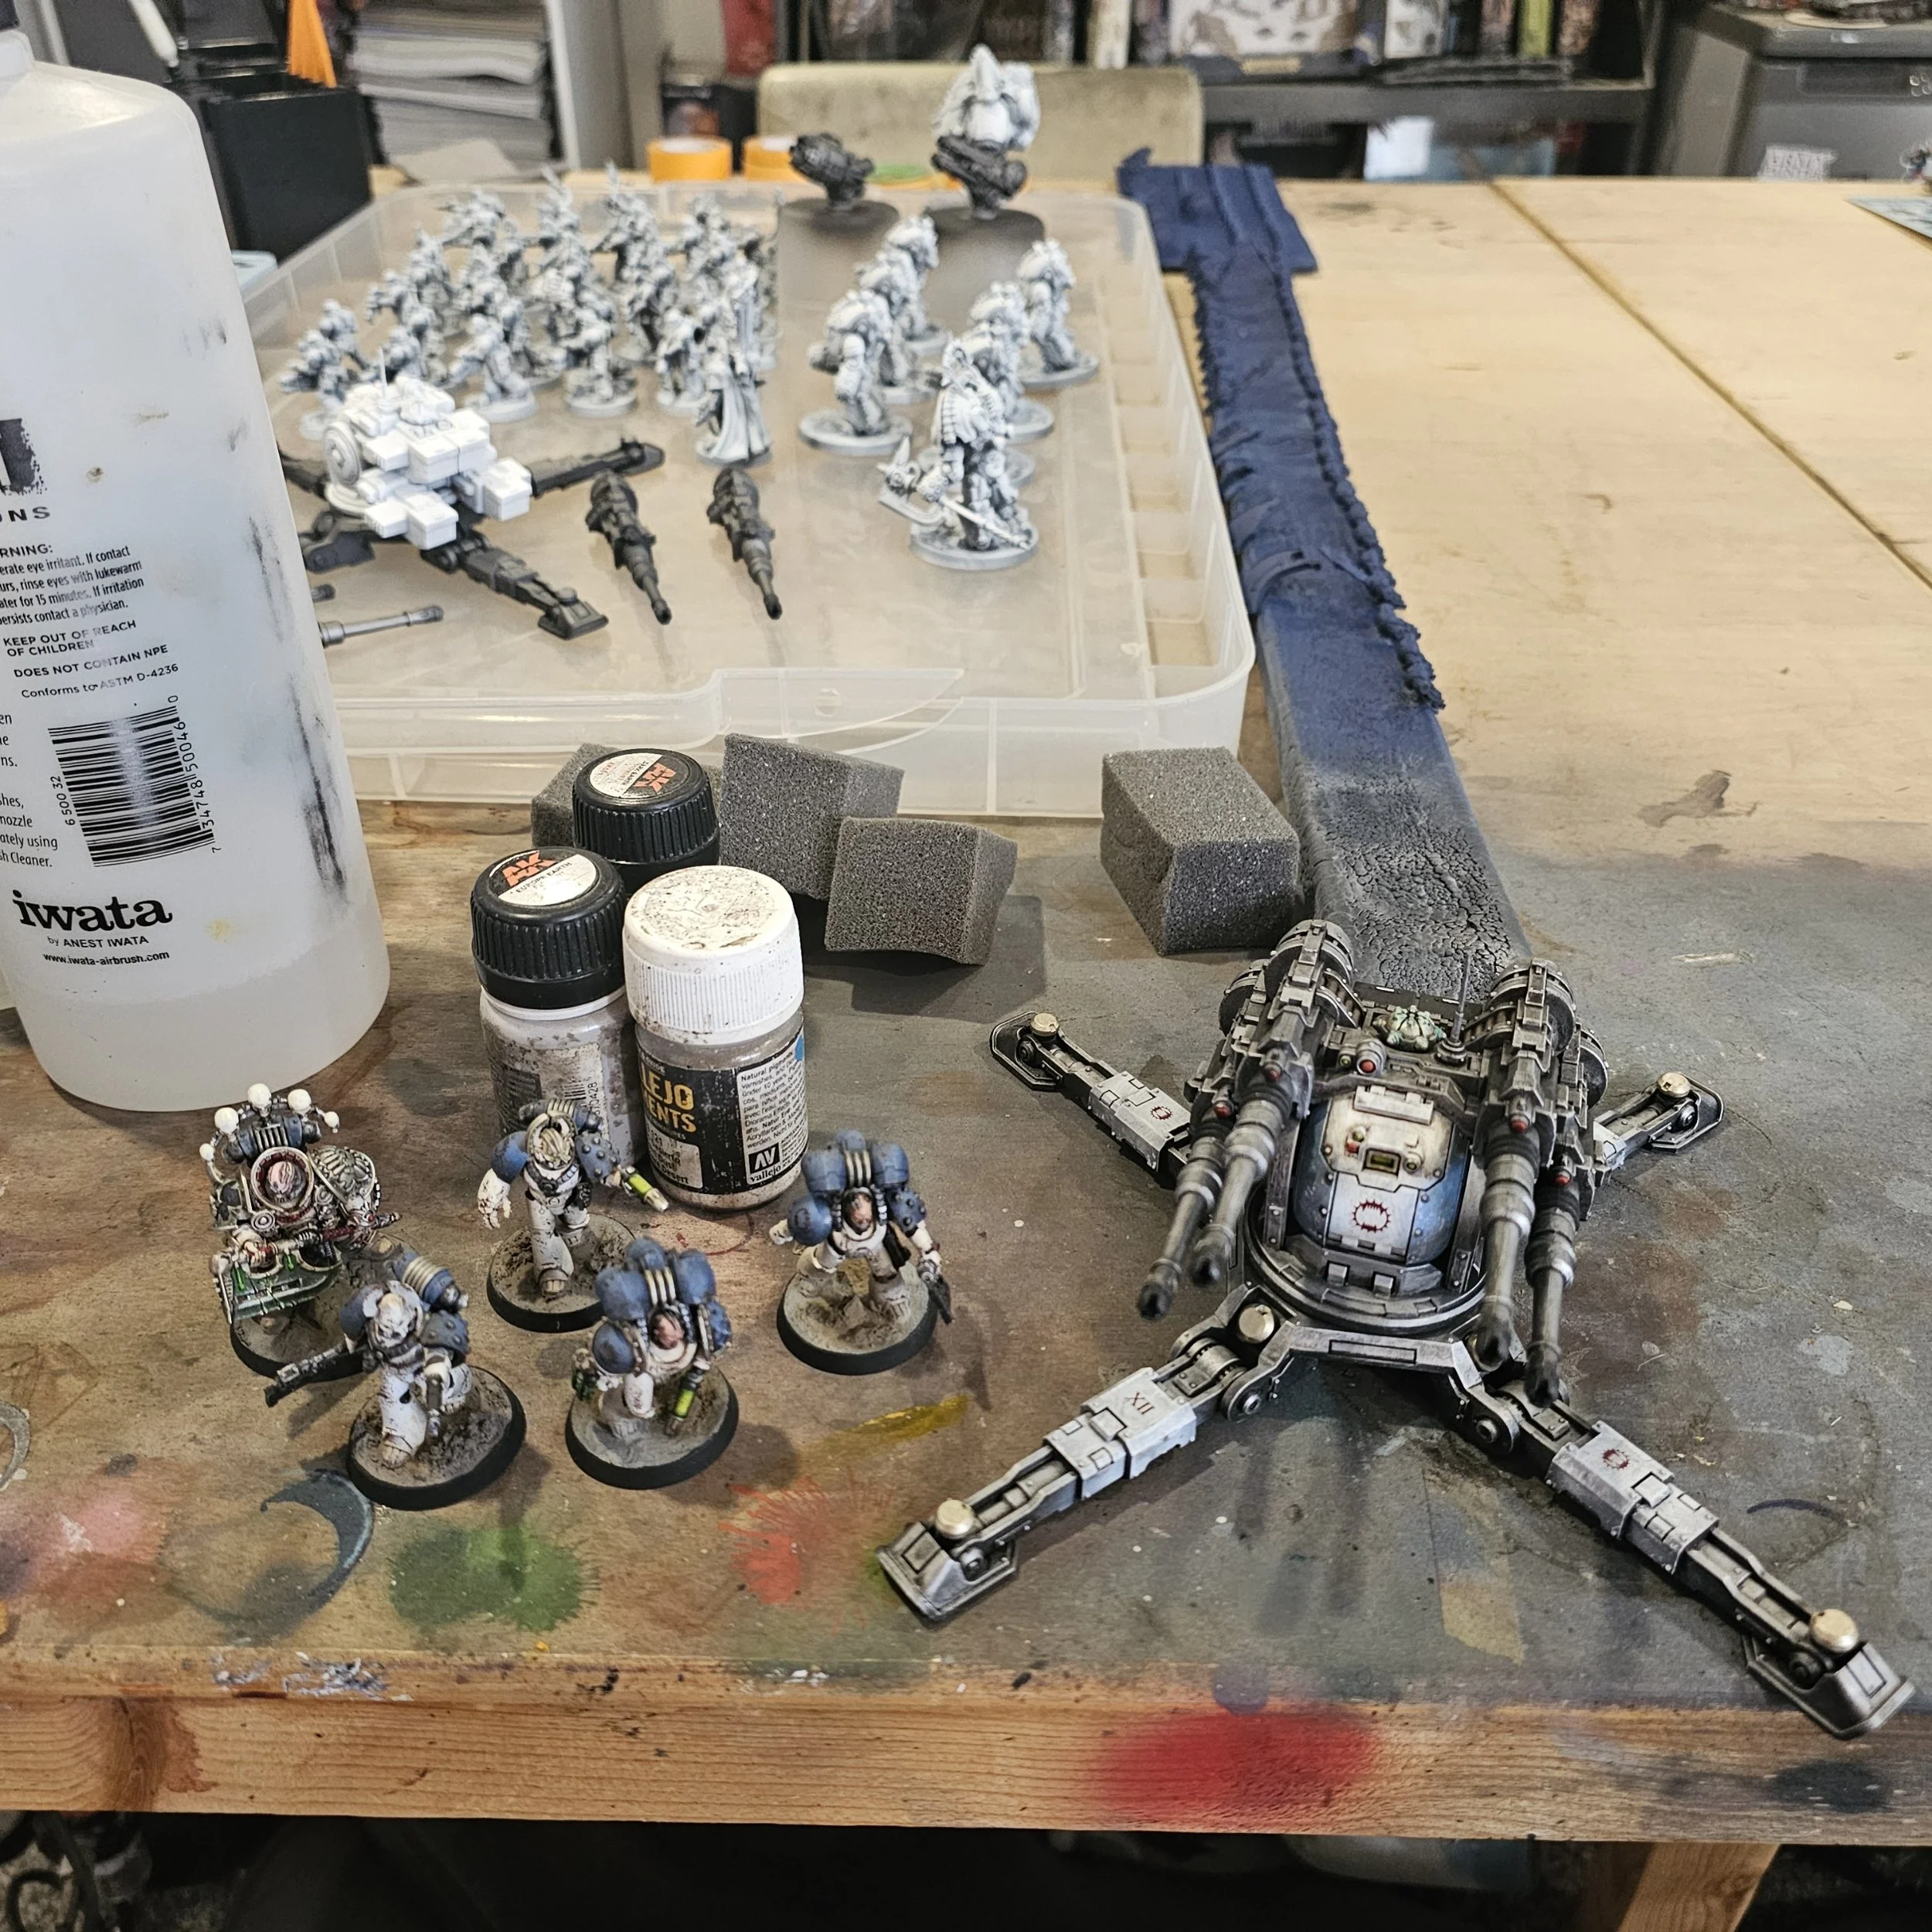
Dedicated hobby space is an absolute god send. I’m fortunate to have an entire office utilized for toy soldier shenanigans. For big hobby dashes like what I’m doing, the kitchen table will need to be claimed for the cause (with the express permission of you delegated adult/wife/partner). The more space you have to have your tools, resources and materials the better. The single biggest time waster for speed challenges is (next to smart phones…) the constant need of picking things up and putting them down (including standing up to fetch that paint you left in the other room).
Limiting distractions and ensuring proper planned setup ahead of your painting session will see a far more productive outcome. Whether it’s your Ork Warboss, or your entire army of World Eaters. It just scales more for space and items required.
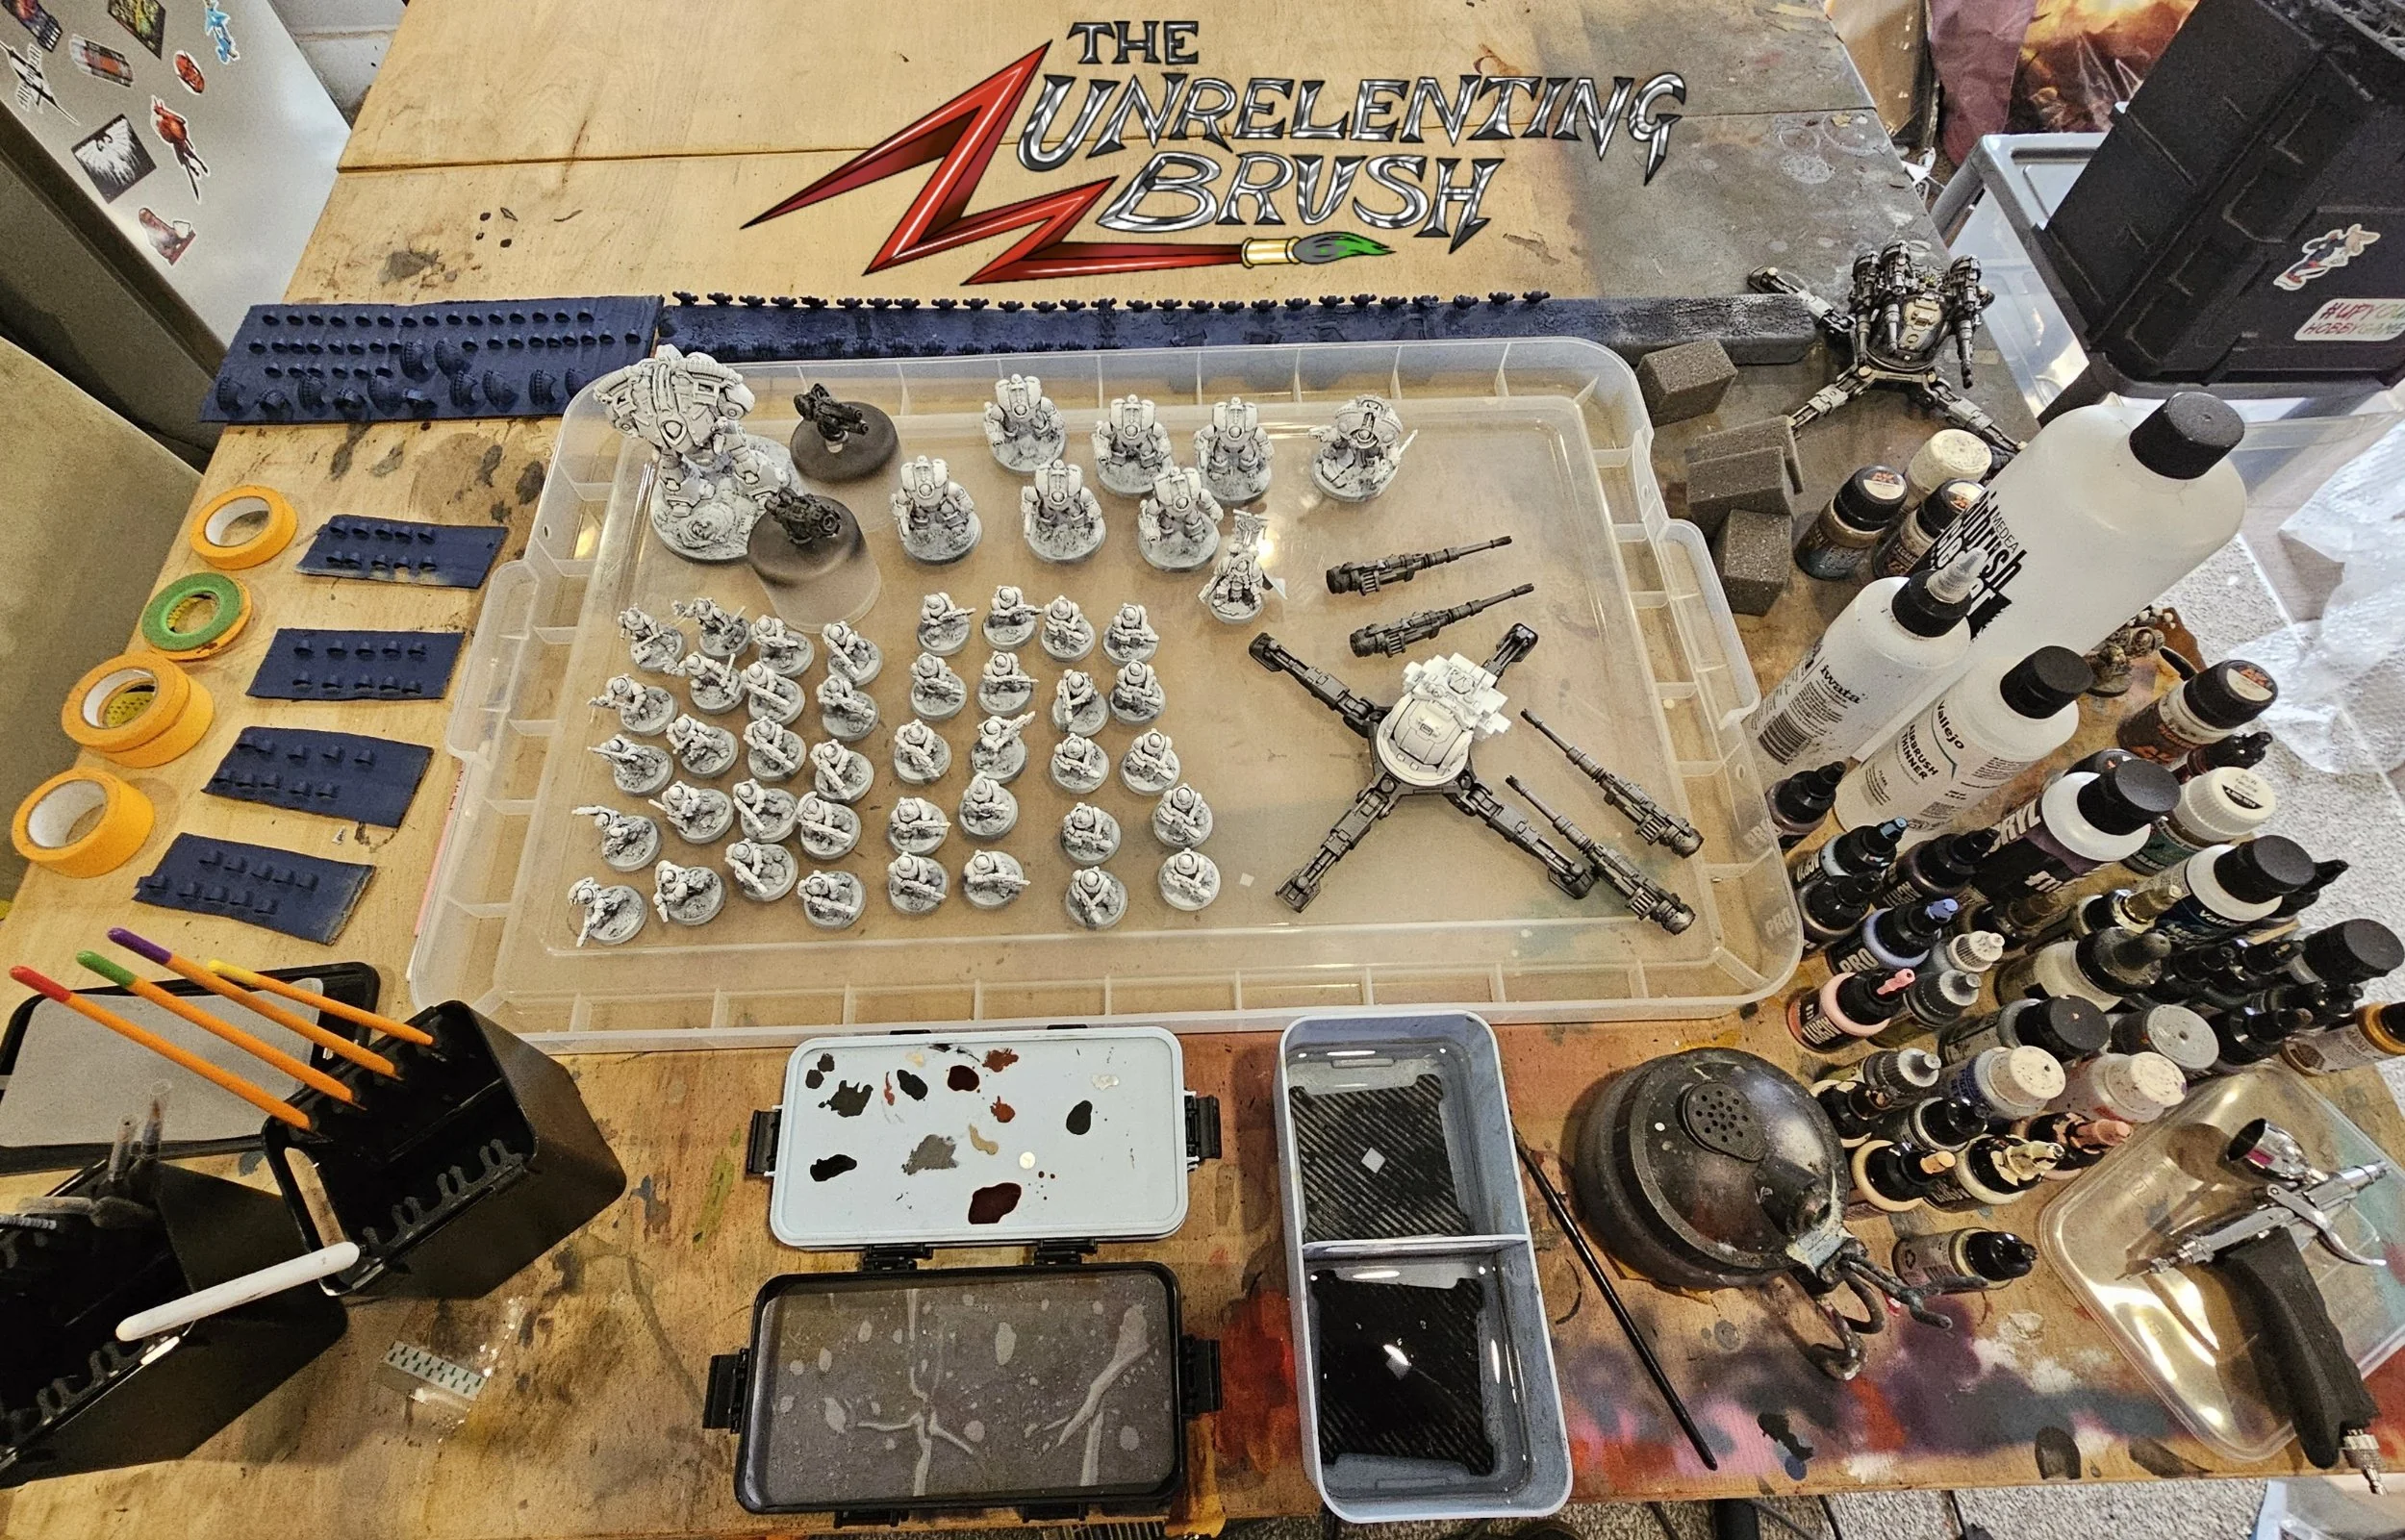
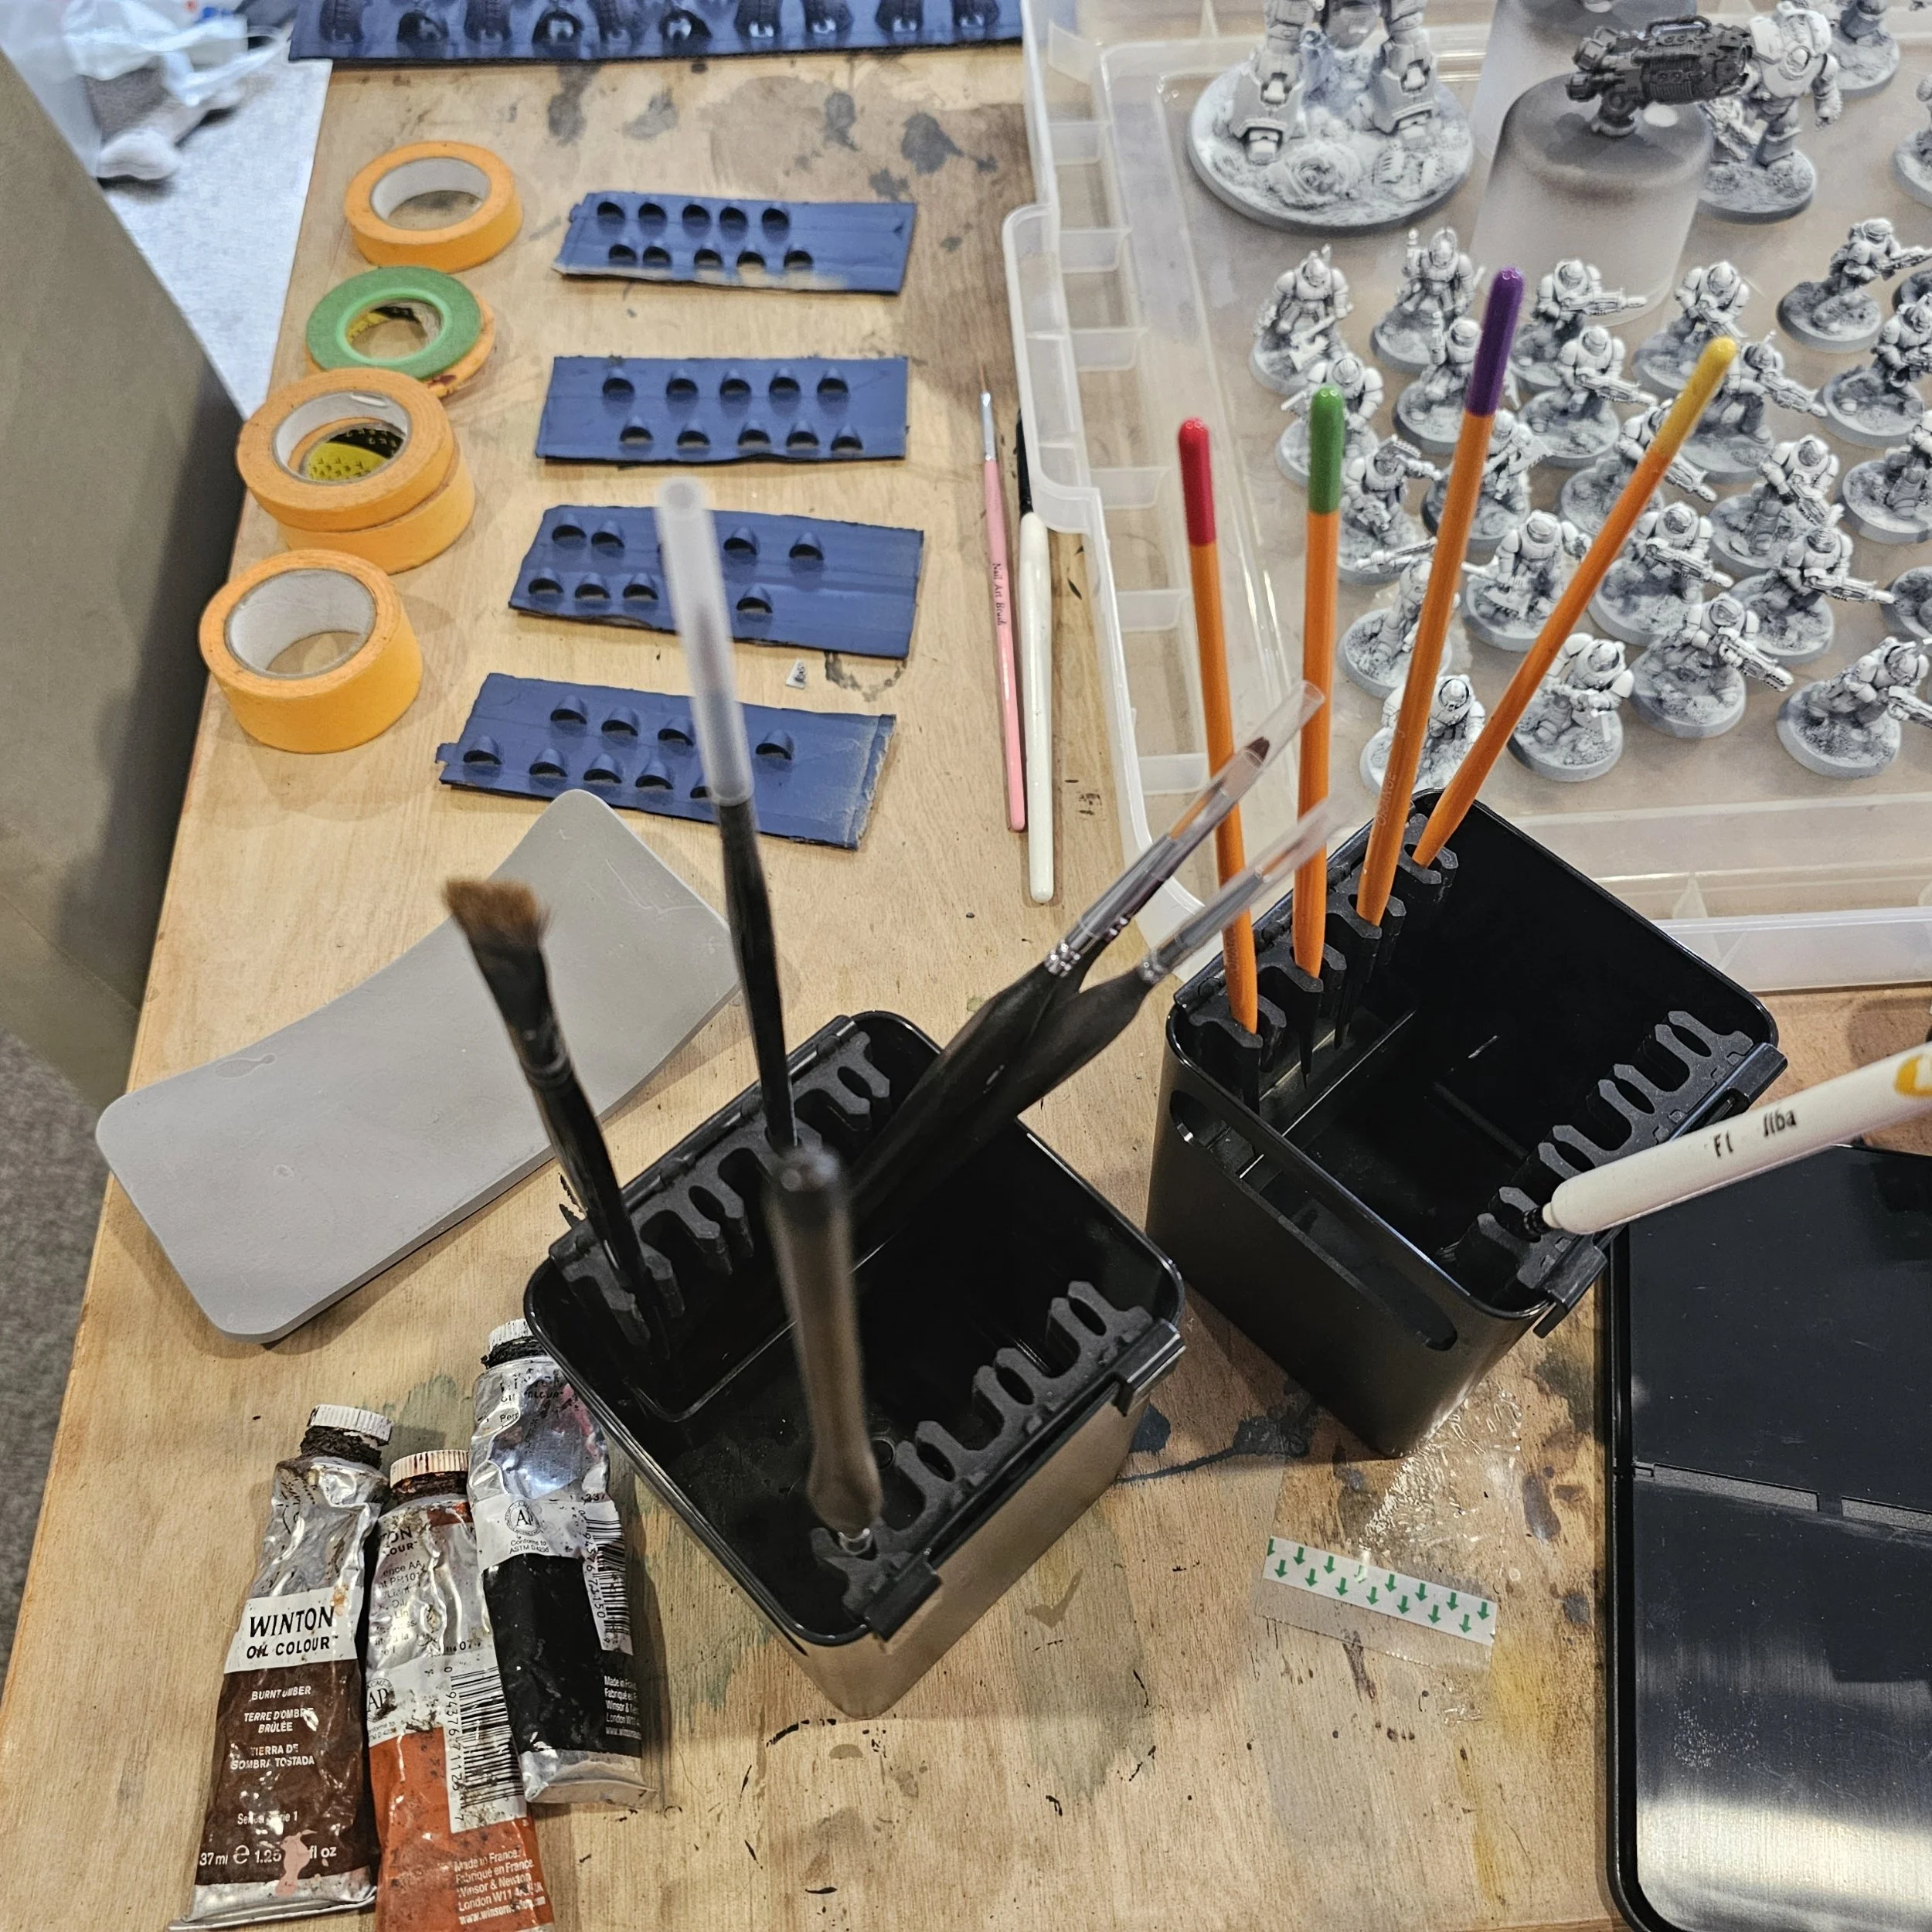
Here’s a breakdown of this setup on my studio 6x4 (from 06:00 clockwise… ish):
Krydrufi Hobby Station Wet pallete. I also use the lid of a compartment for things like metallics and speedpaints as not to contaminate my water and foam.
Water pots from the same station. One is used for non metallics, and the other for metallics, when brush cleaning.
Brush pots. These have my Orange Brushes for detail and base colour work. I also have some ratty brushes for mucky work, drybrushes a plenty so I don’t have to wait for ones to dry, and some really old haggered ones for Oils and airbrush mixing.
Oil paints (with white spirit to come, I need to pop out and buy a fresh bottle).
Masking tape of varying widths.
Cardboard and Spray Stick covered in my blue sup assemblies.
A large plastic lid for the models being painted. This keeps them all together, but also works for if I need to move the lot out of the way ready for airbrushing those shoulder pads (instead of shuffling 50 models by hand). I make a rule of ensuring only models go on the lid. Nothing on the table goes on the lid, and the models on the lid don’t go on the table. Likewise, it means if I need to take the models outside to dry rapidly (Like when the oil washes go on), I cart out 50 models at once in one smooth trip. So long as I don’t go arse over tit due to a dog shuffling underfoot, it’ll be reet! Also, notice the paint can lids the Dreads weapons are blue tac’d to for airbrushing? These will double up as oil mixing pots when the time comes!
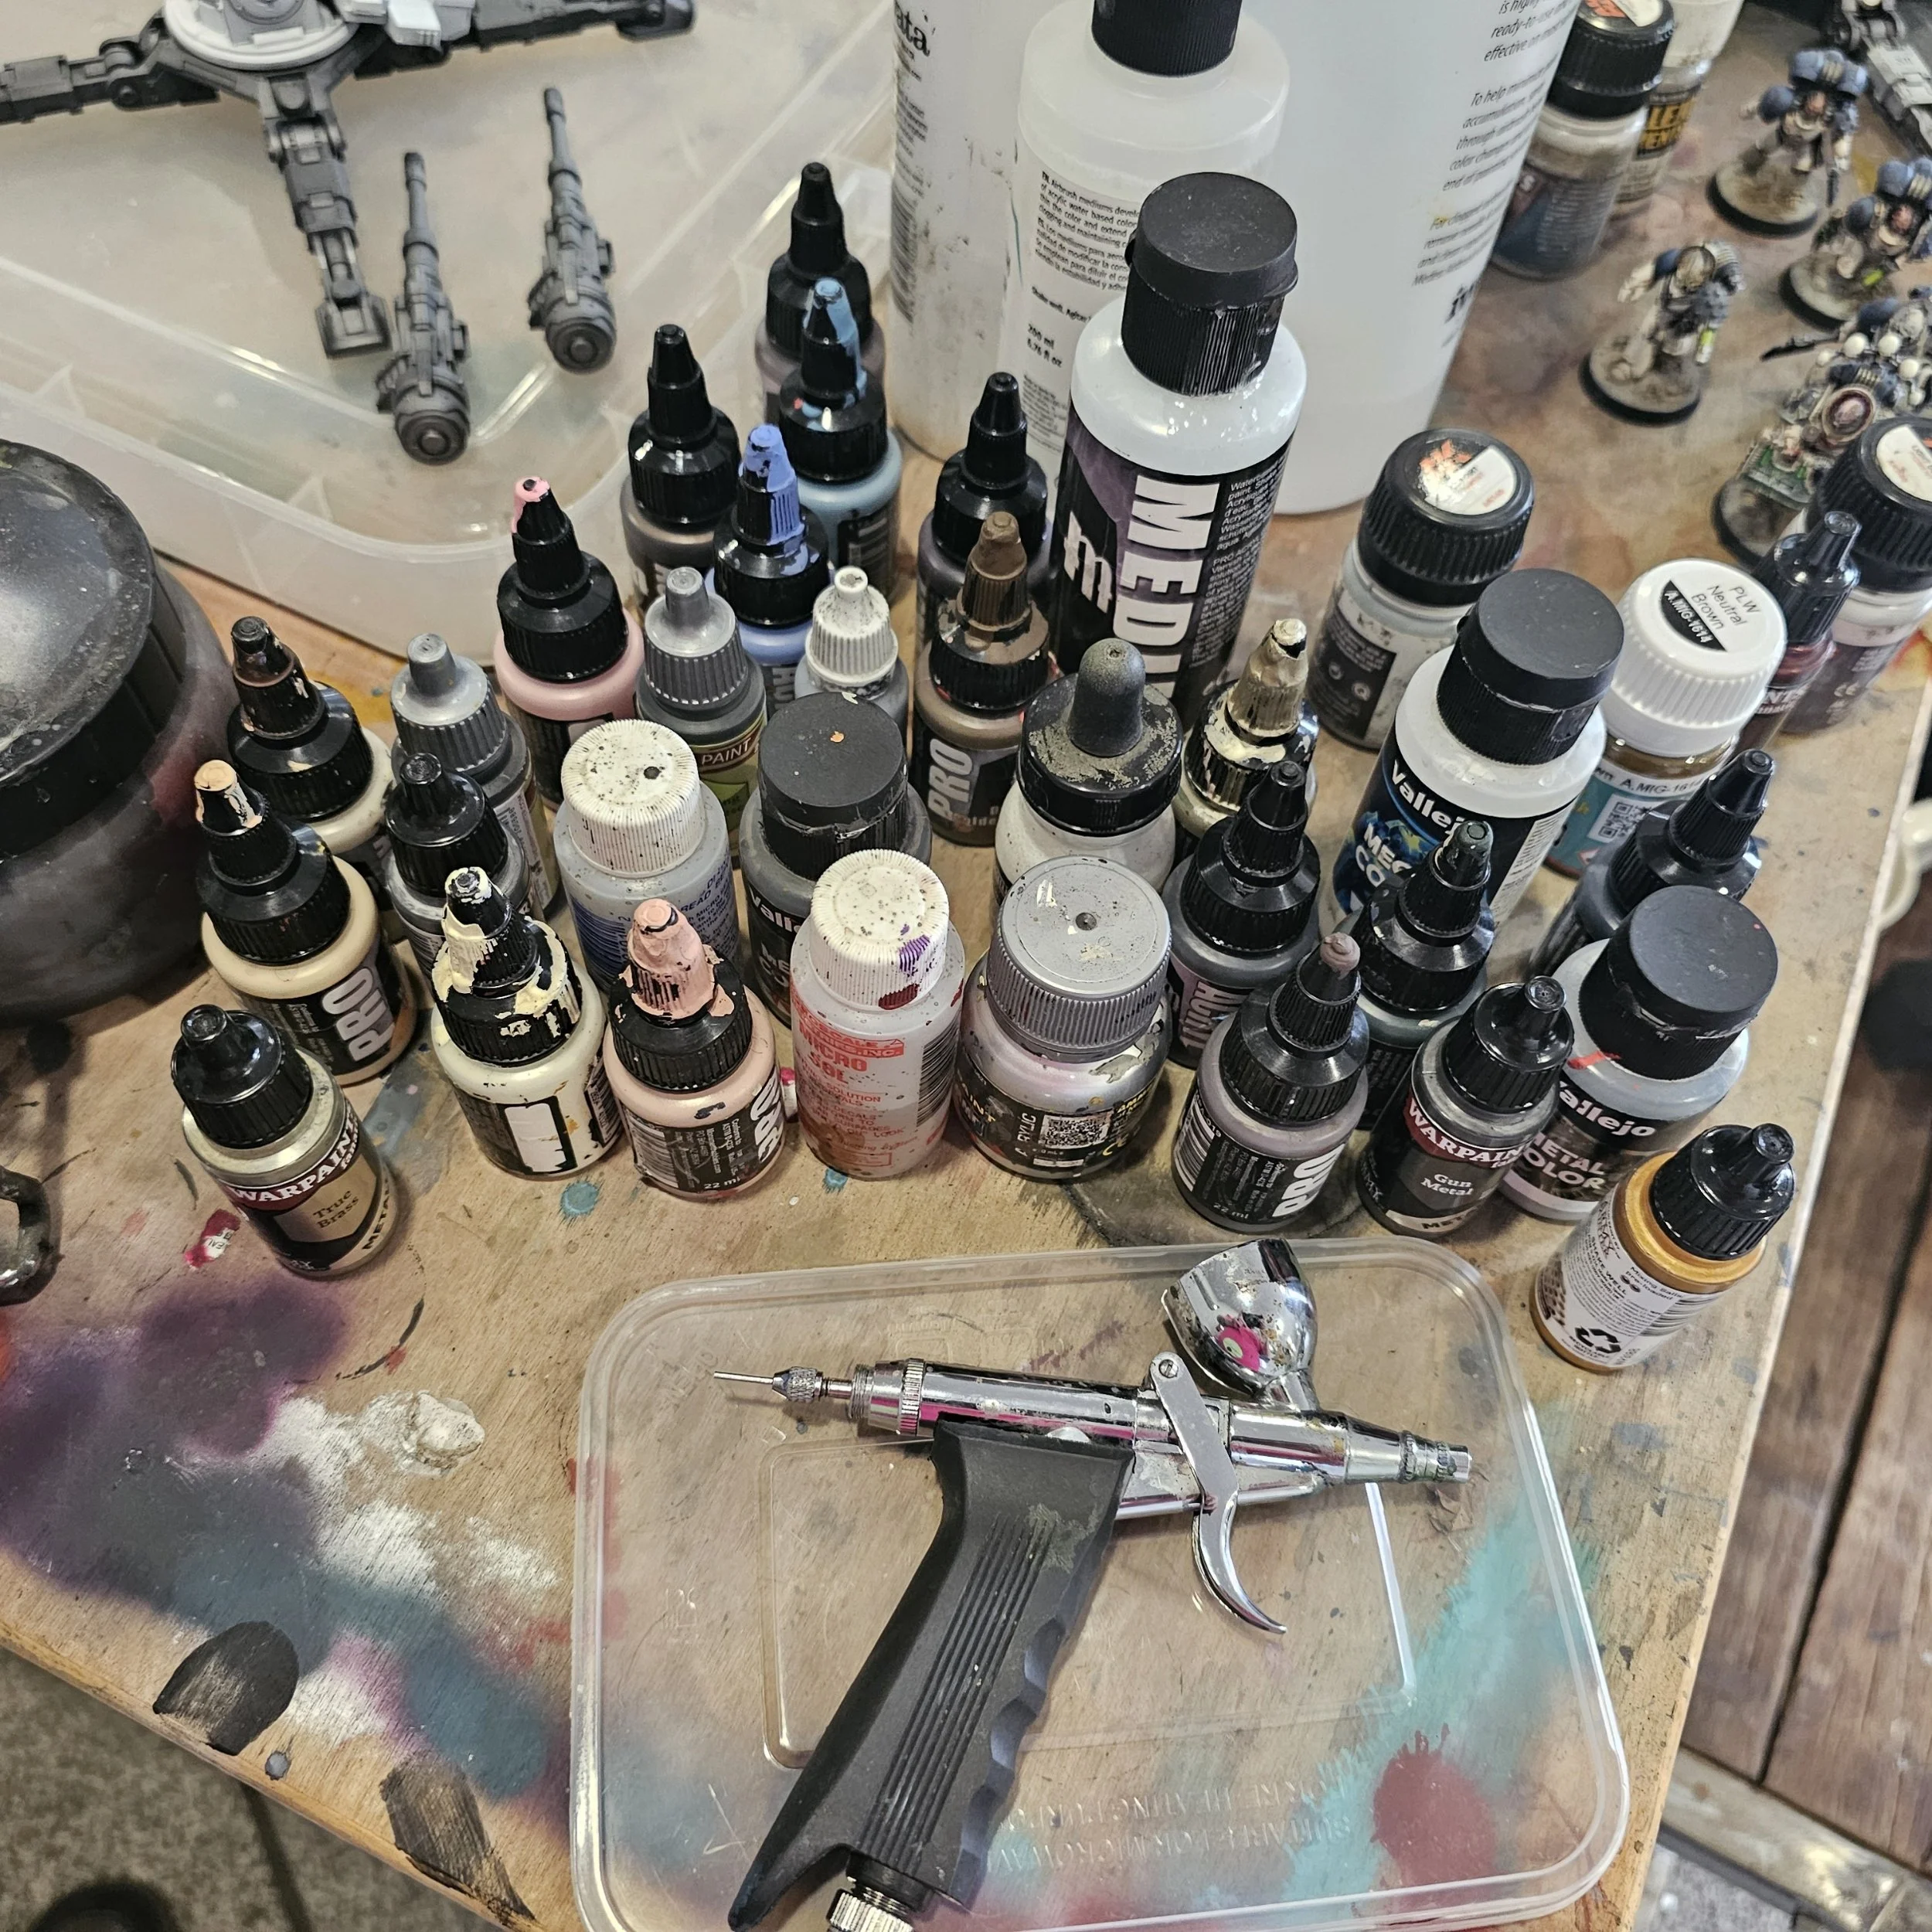
Airbrush, airbrush blow pot, airbrush cleaner, thinner, various gubbins… and a shit load of paints and pigments!
Case Sponge, for spongey painty weathering goodness!
Painted Models for the same force! I like to have completed models for a current project in eye line so I can check for colour matching, plus inspiration to keep fighting the good fight and get the work done!
Transfers (the majority of) cut off the sheet ready to be moistened and applied. This is for the majority of the marines. I’ll sort out the transfers for the Terminators, Characters and Dread once they’ve got more paint on them during the weekend.
Everything here is within arms reach from where I’ll be working, I have a hair dryer behind me for as and when I need it too.
So, apart from the white spirit mentioned above, and a metric ton of tea/coke/beer for the weekend. I am locked, stocked and ready to rock!
That’s the end of this article. Thank you very much for indulging in my word vomit! Hopefully you’ve done something here beneficial for yourself in your own hobby, big or small.
The next article (either tomorrow or at the end of the paintathon) will be on the paint scheme itself! And how it will be applied to 50 models over a weekend to (hopeful) completion.
Don’t forget! This is all in aid of Acorns Children’s Hospice. A Birmingham based charity who support families and children going through Hell. I’m attempting to rouse the Warhammer/Heresy community to donate to their incredible work. We smashed our first two goals, the third one is a huge £1000 target! You can donate via the link Here. Likewise, any shares or promotions in your own hobby circles/chats/socials helps spread the word and achieve the goal!
Keep kicking ass, and be sure to check my socials over the weekend for how the project progresses:
Peace!
Chris